Register namespace in Cloud Map
The next steps will involve configuring the Frontend and Backend in separate ECS Services. However, we don’t have a way for the services to communicate with each other (even though they are in the same cluster). Therefore, in this section, we will configure Namespace and Service in Cloud Map.
Once we have the Service Discovery Name, the Frontend Service can use that “name” to resolve the IP address of the Backend Service, allowing the Frontend Service to communicate with the Backend Service.
Create a namespace
Search for Cloud Map on the AWS console
- Select Cloud Map

In the namespace section
- Click Create namespace

In the create namespace interface
- Name:
fcjresbar.internal - Description:
Use for internal API Calls and DNS - Instance discovery: Select API calls and DNS queries in VPCs.

Next
- Select the VPC that we created earlier
- TTL (Time to live): 20s
- Click Create namespace

Our namespace has been successfully created

Create a service in the namespace
Now, we will create a service in the newly created namespace
- Go back to the details of the newly created namespace
- Scroll down to the bottom
- Click Create service

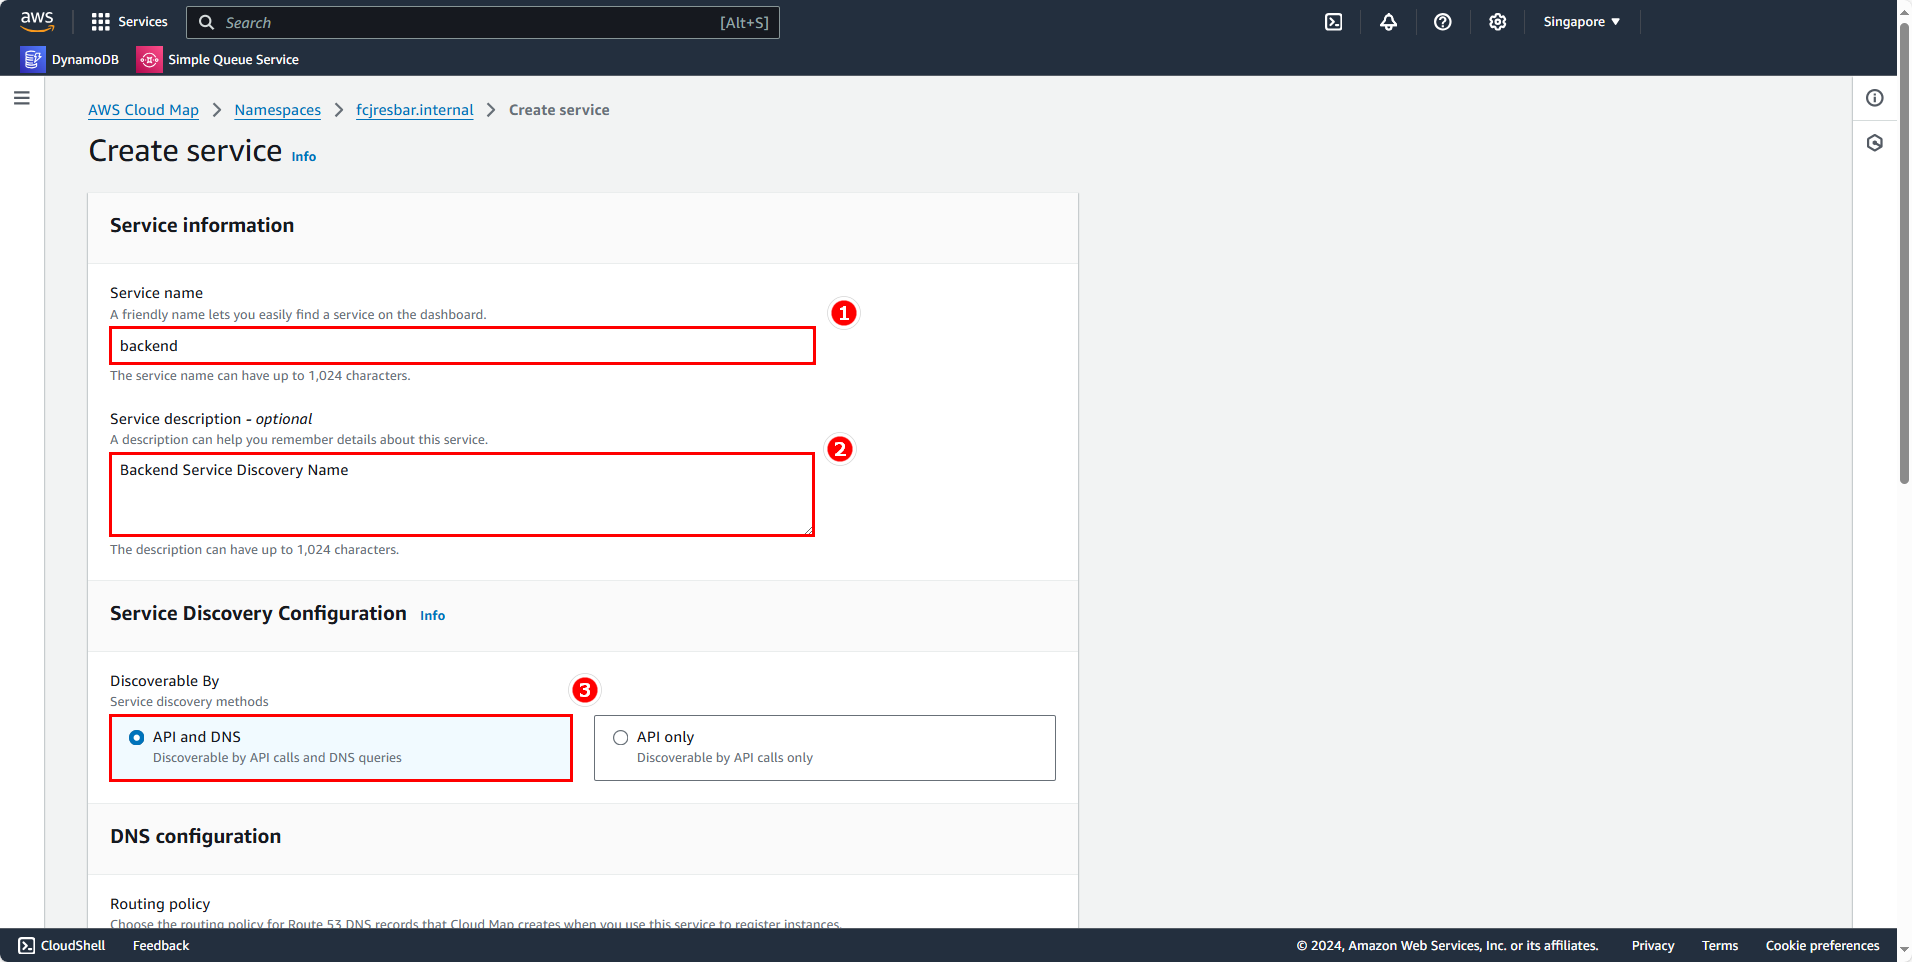
Fill in the following information to create the service
- Name:
backend - Description:
Backend Service Discovery Name - Discoverable by: Select API and DNS

With the service name backend, the full Service Discovery name for the Backend will be backend.fcjresbar.internal. Make sure to copy this name as we will need it when configuring the Task Definition for the Frontend service.
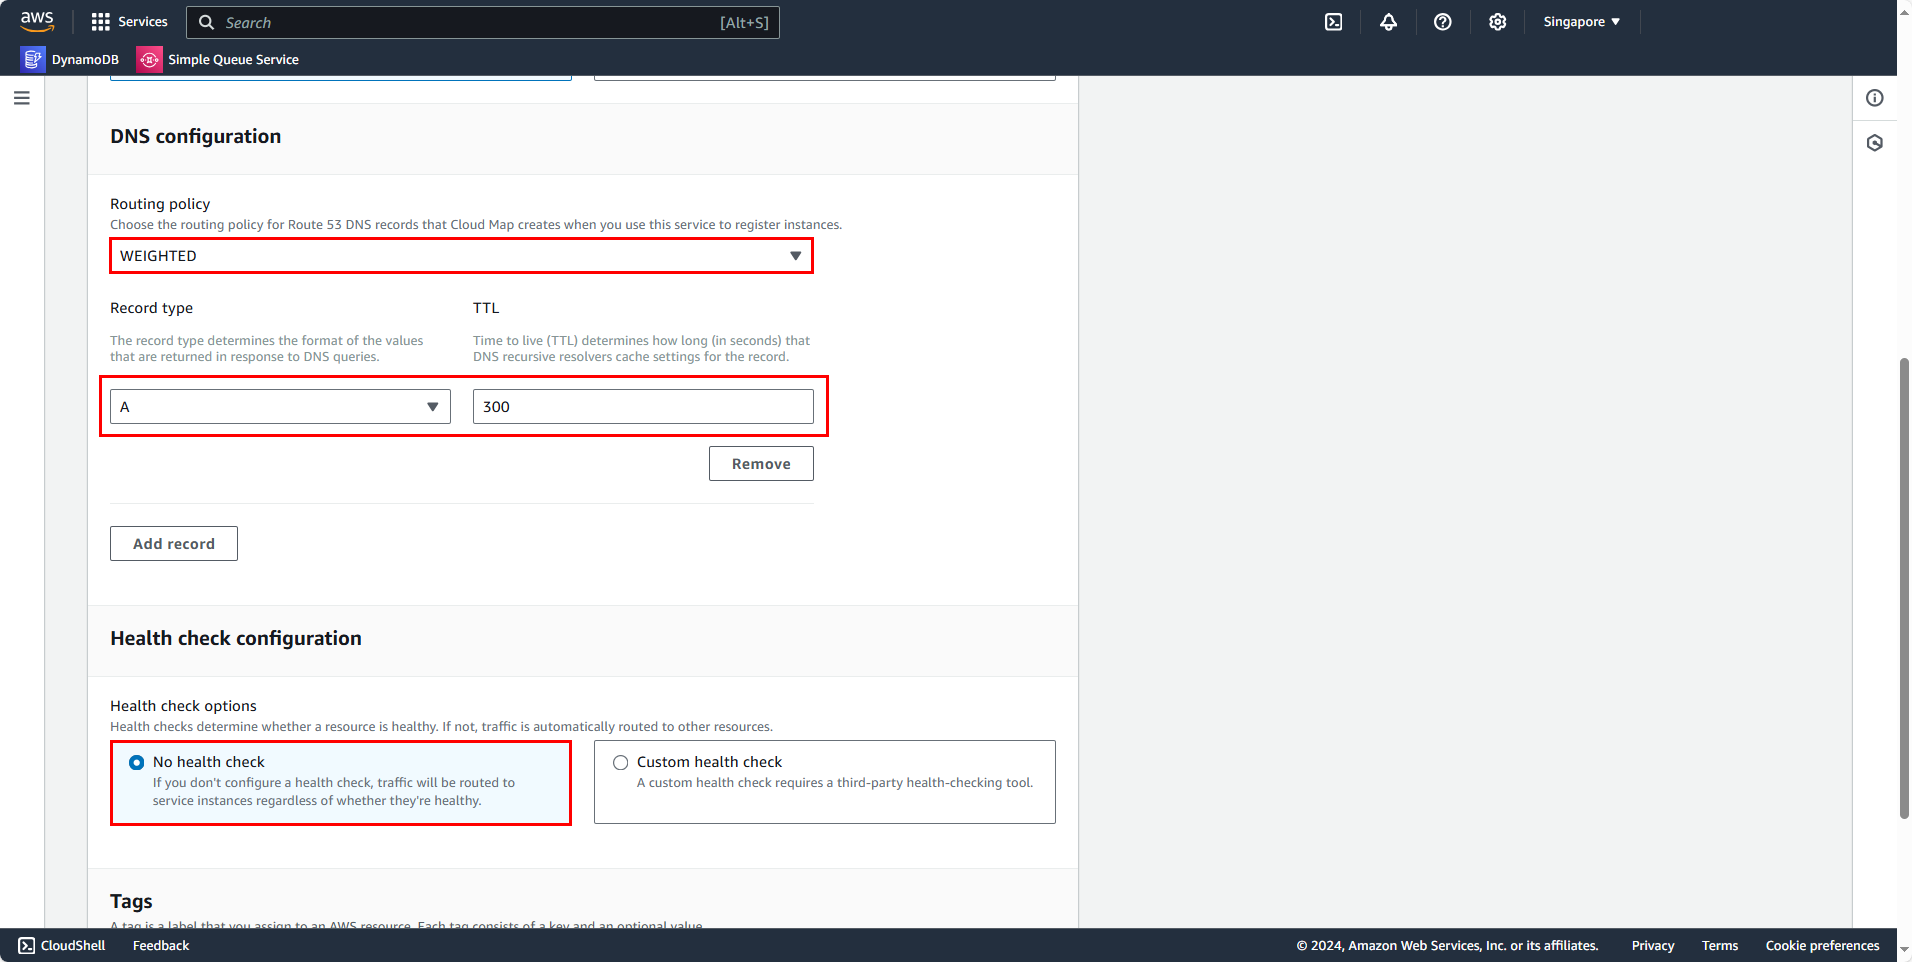
Next, in the DNS Configuration section
- Routing policy: Select WEIGHTED
- Record type: A (for IPv4)
- TTL: 300
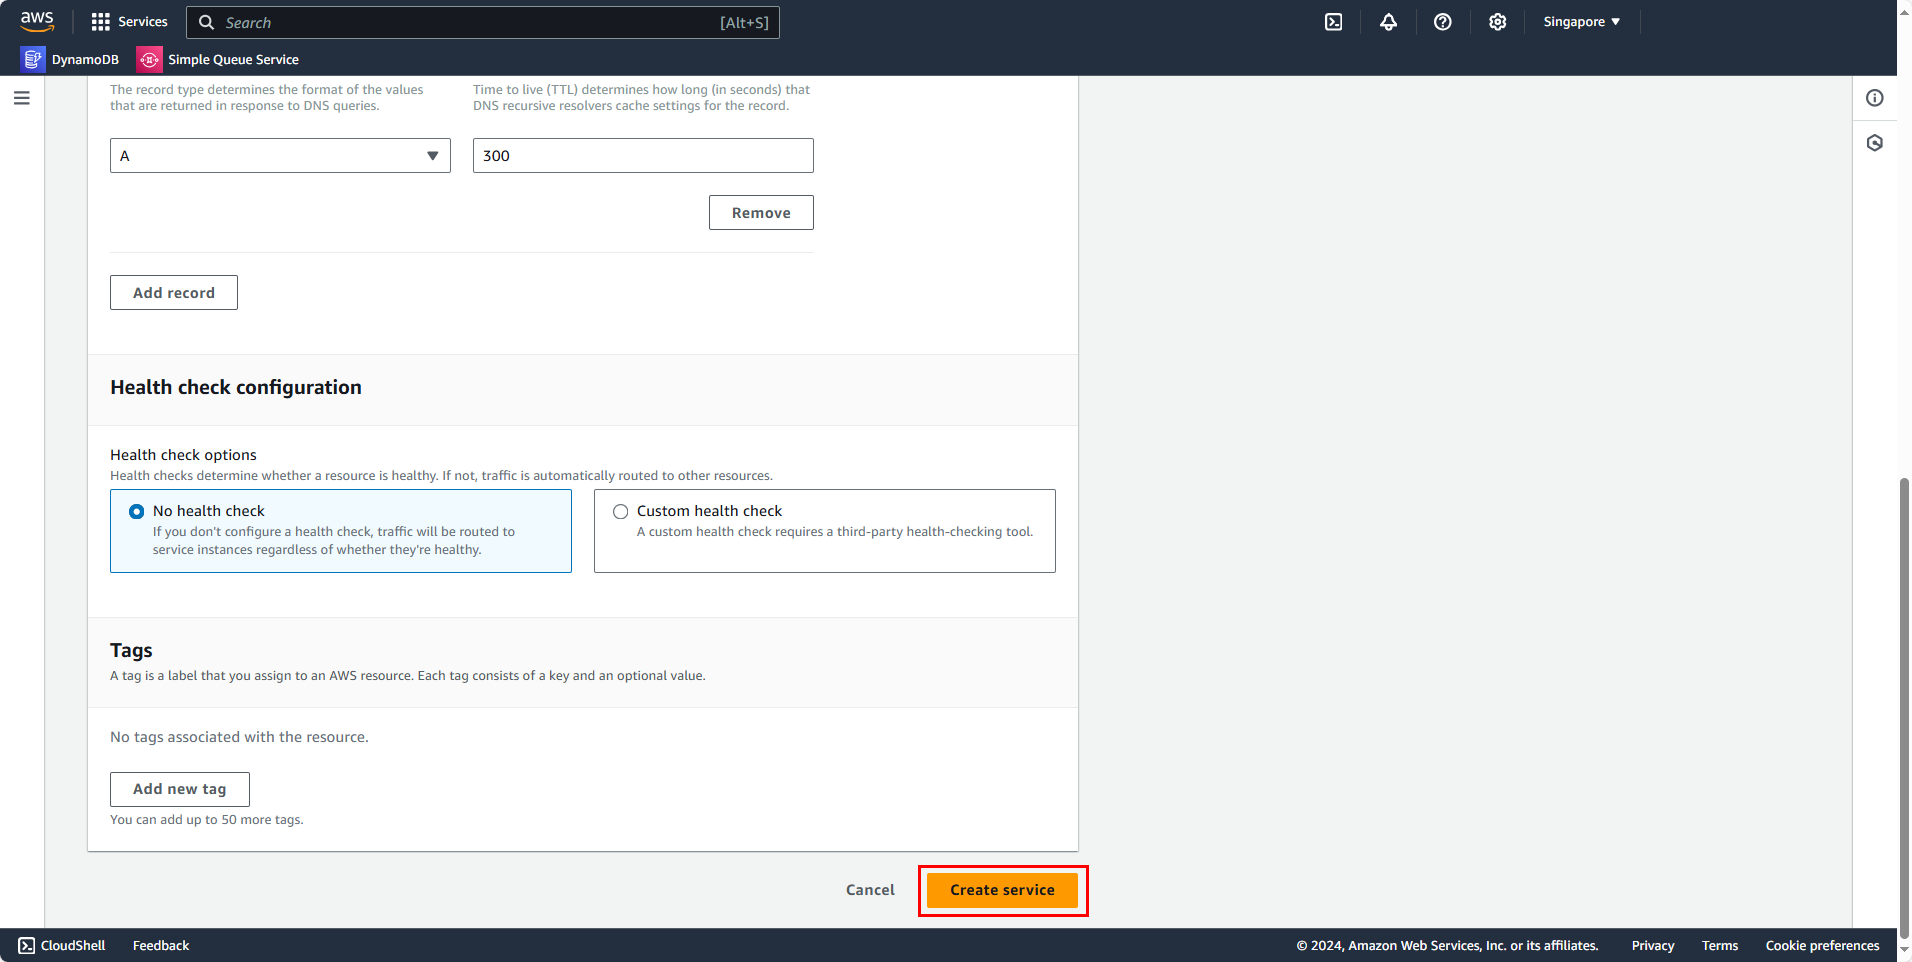
- Health check option: Select No health check


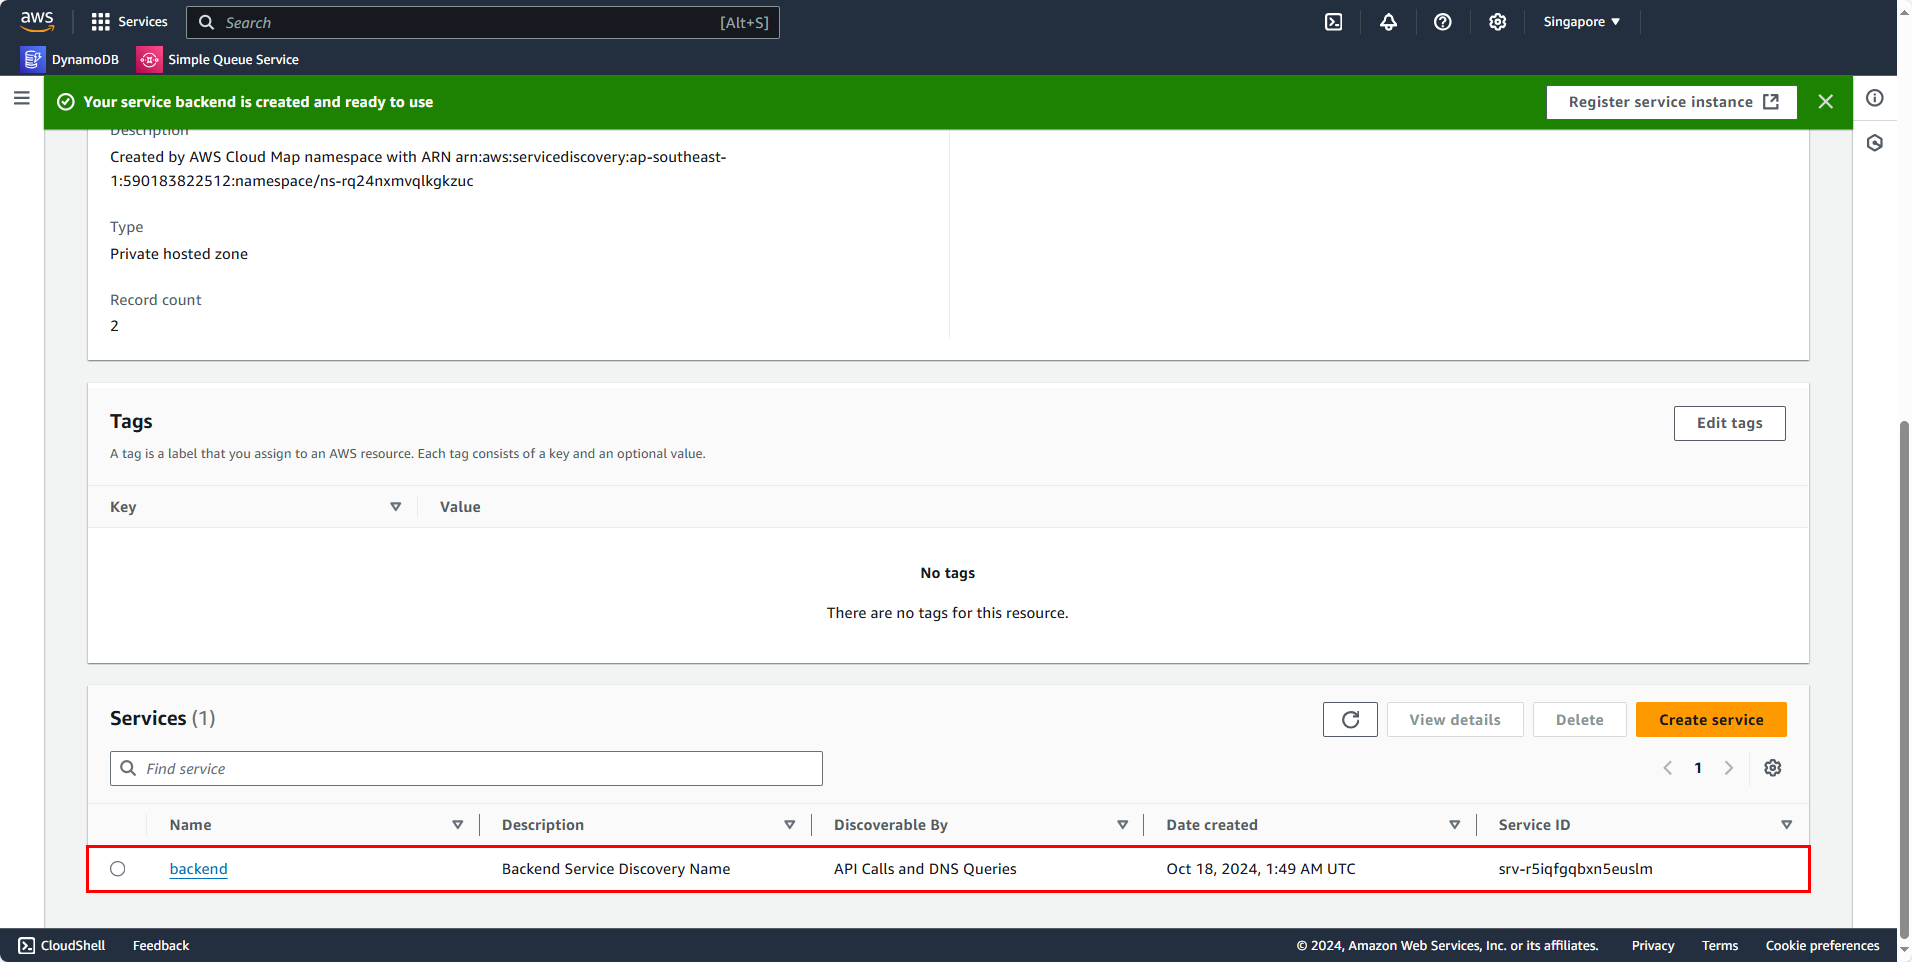
Now, we need to wait for a while until the service is fully created.
