Clean Up Resources
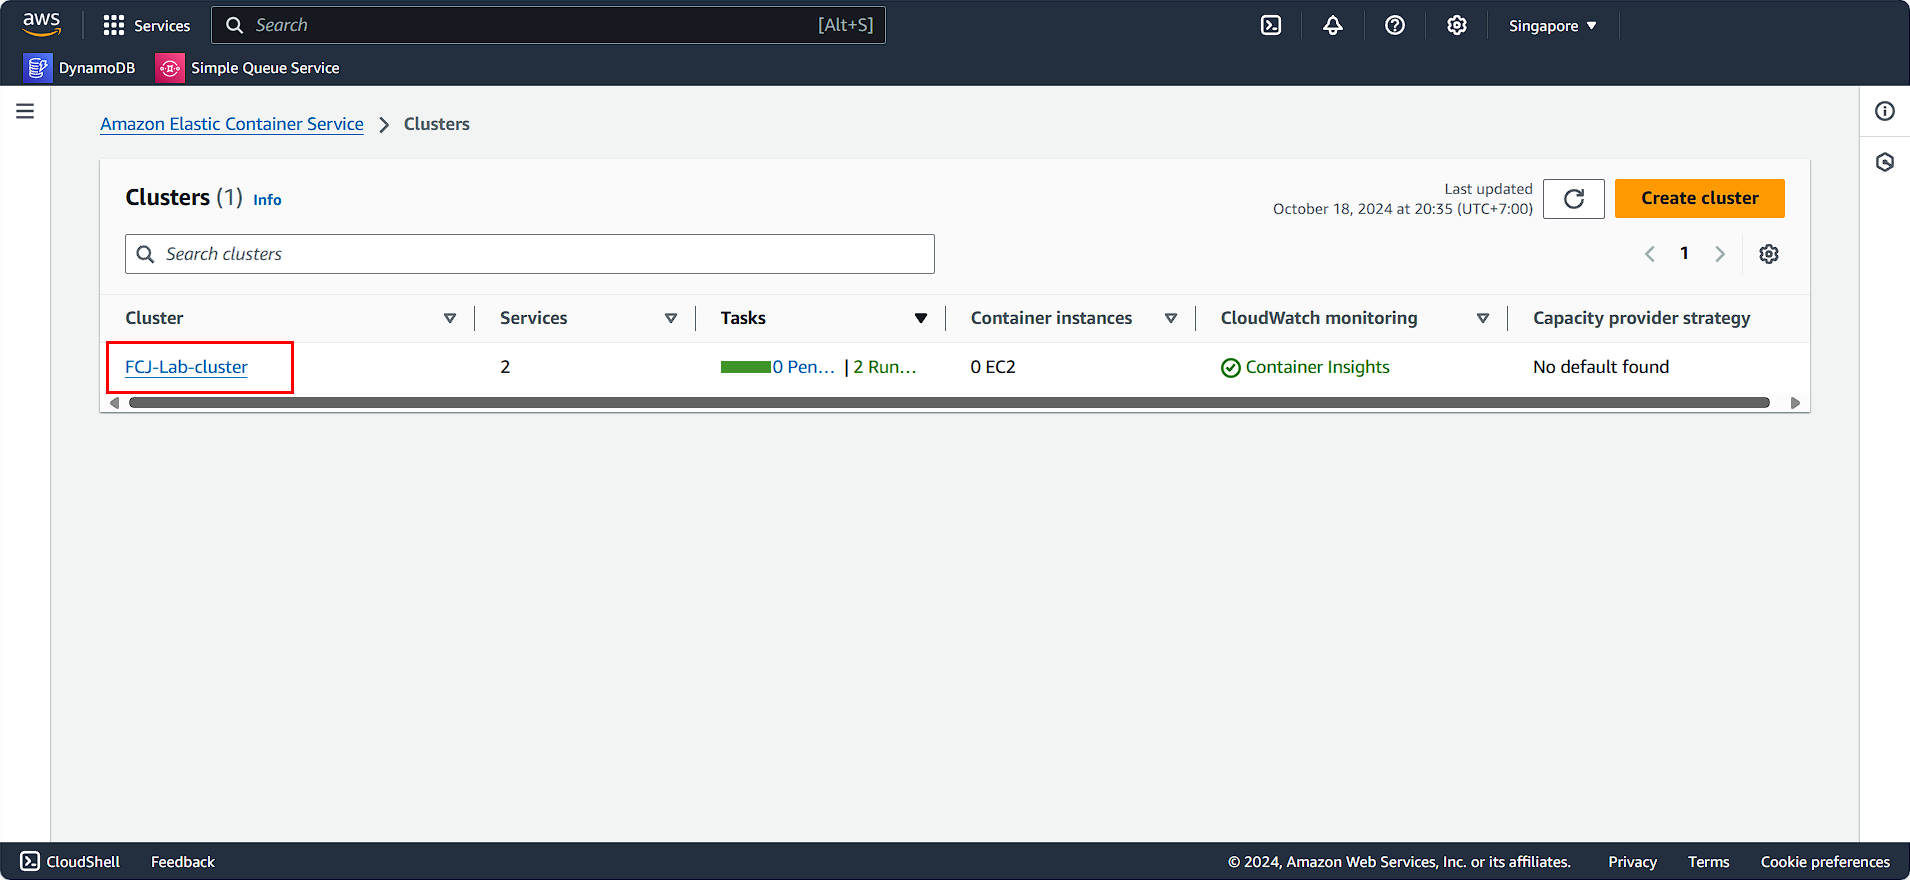
Delete Elastic Container Service
- Search for and select Elastic Container Service.

- Choose FCJ-Lab-cluster.
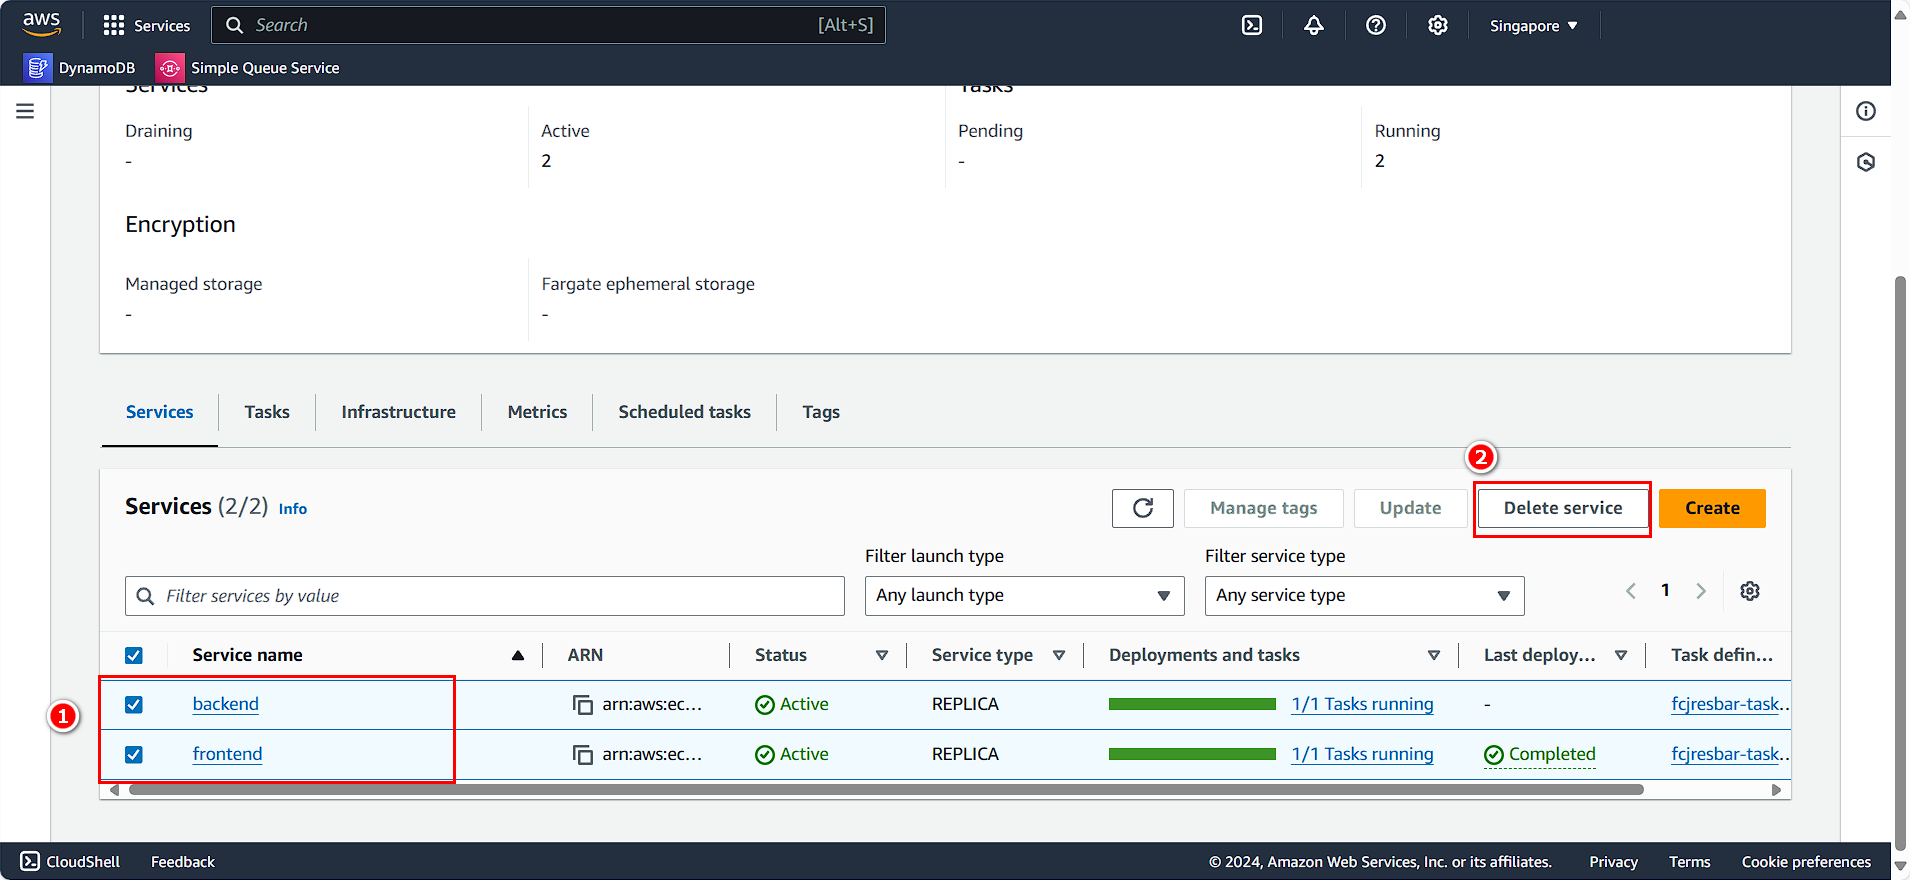
In the Services section:
- Select the two running services.
- Click Delete service.
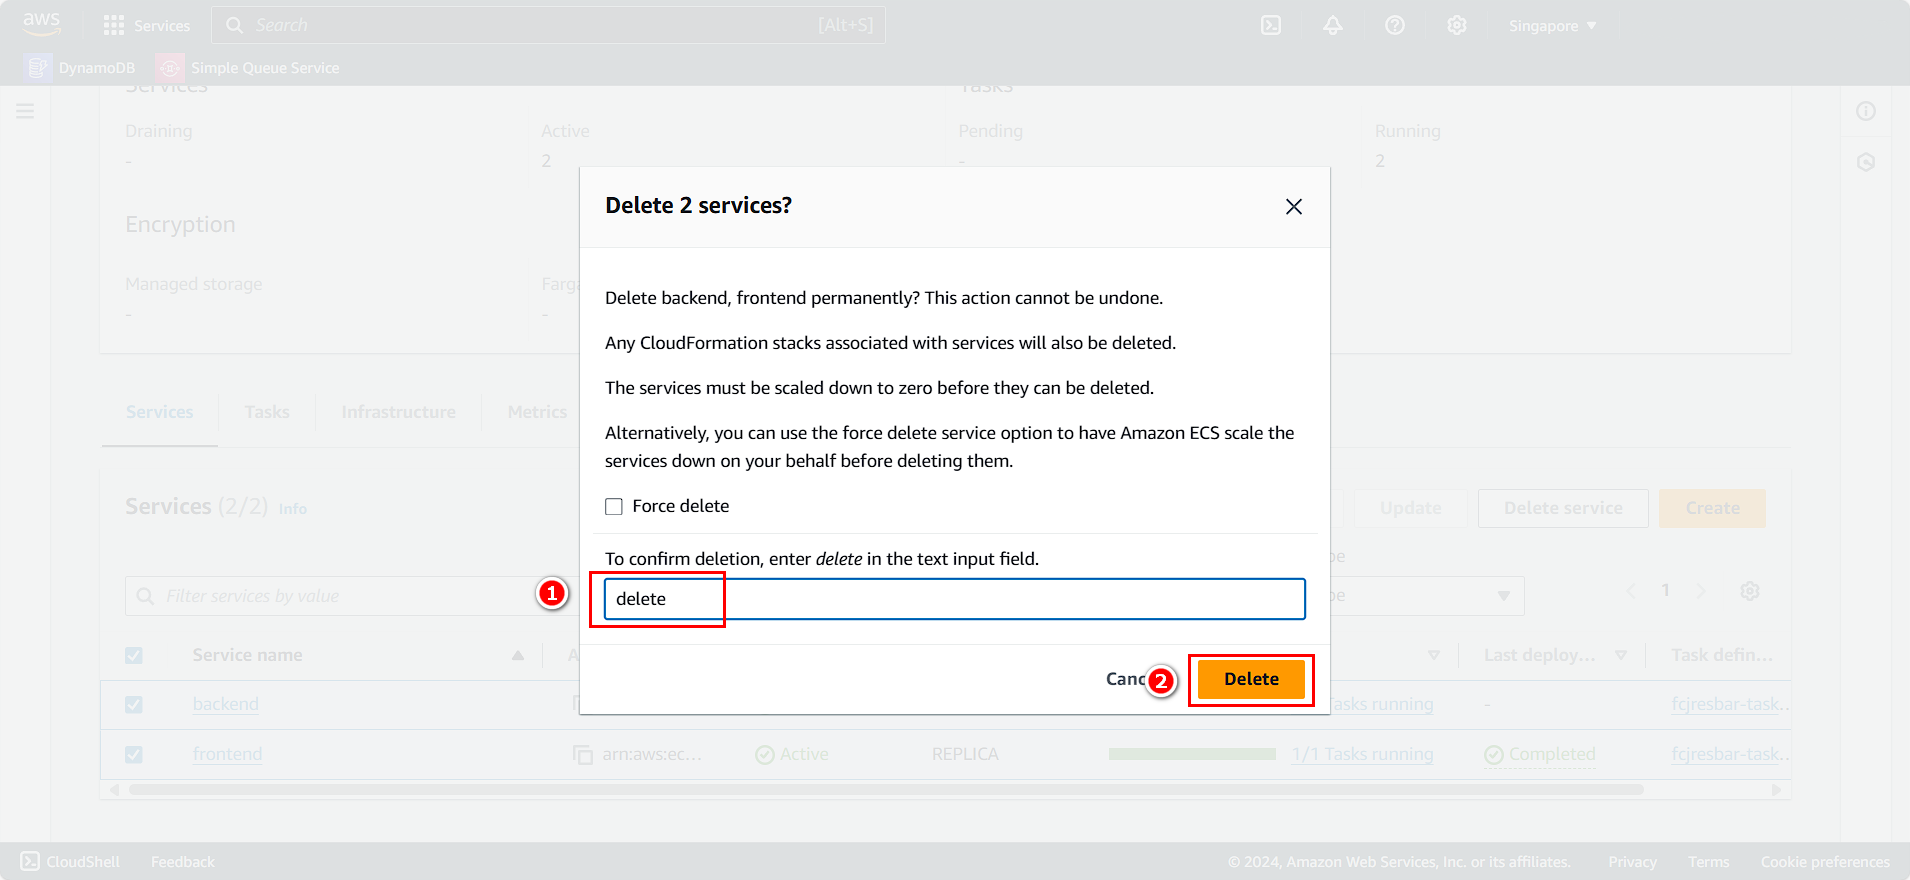
- Enter
delete. - Click Delete.
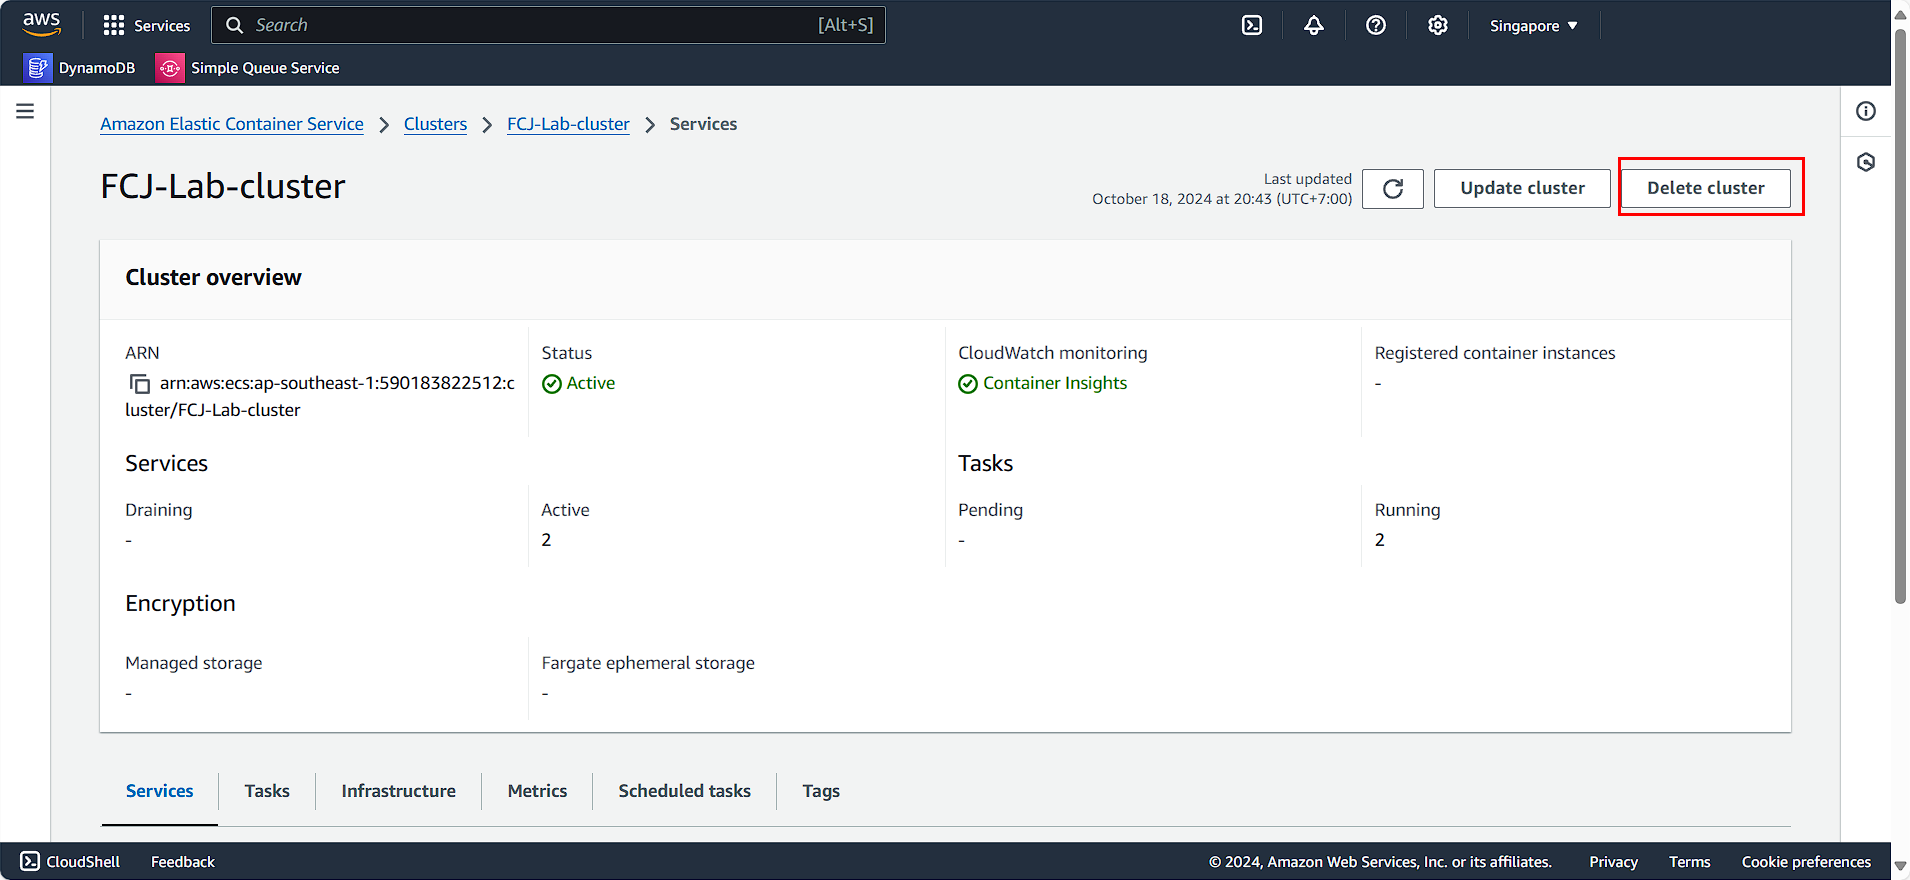
After cleaning up the running services, we will proceed to delete the Cluster:
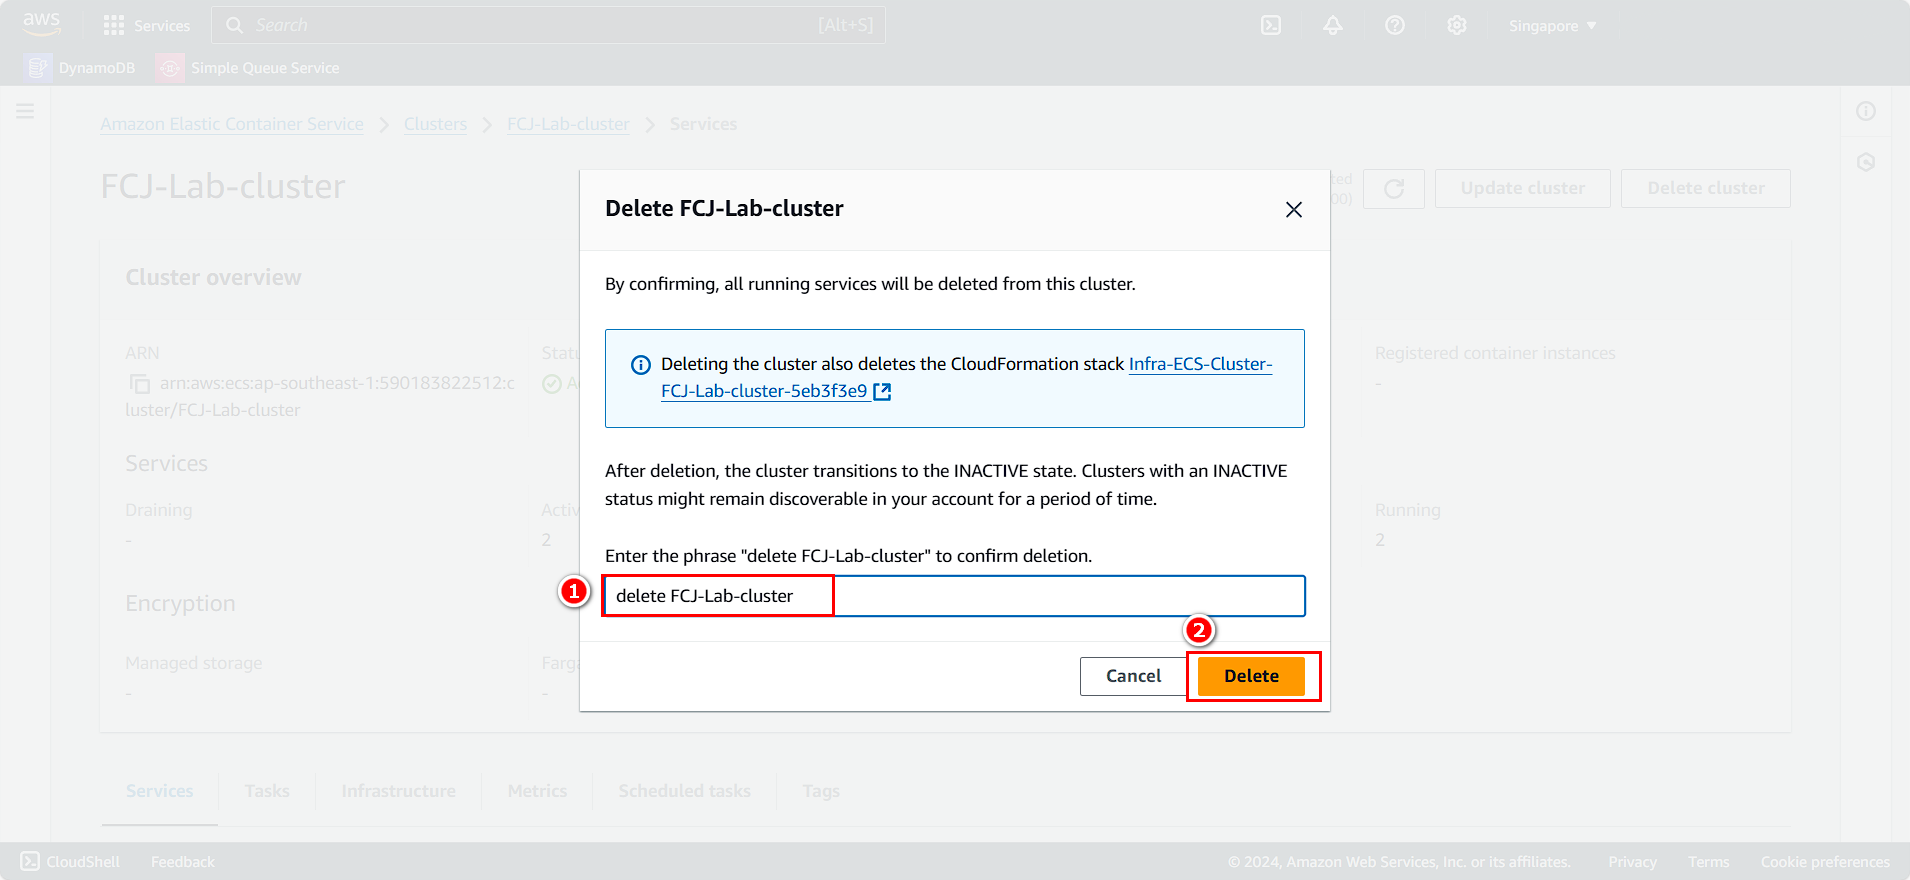
- Click Delete cluster.
- Enter
delete FCJ-Lab-cluster. - Click Delete.
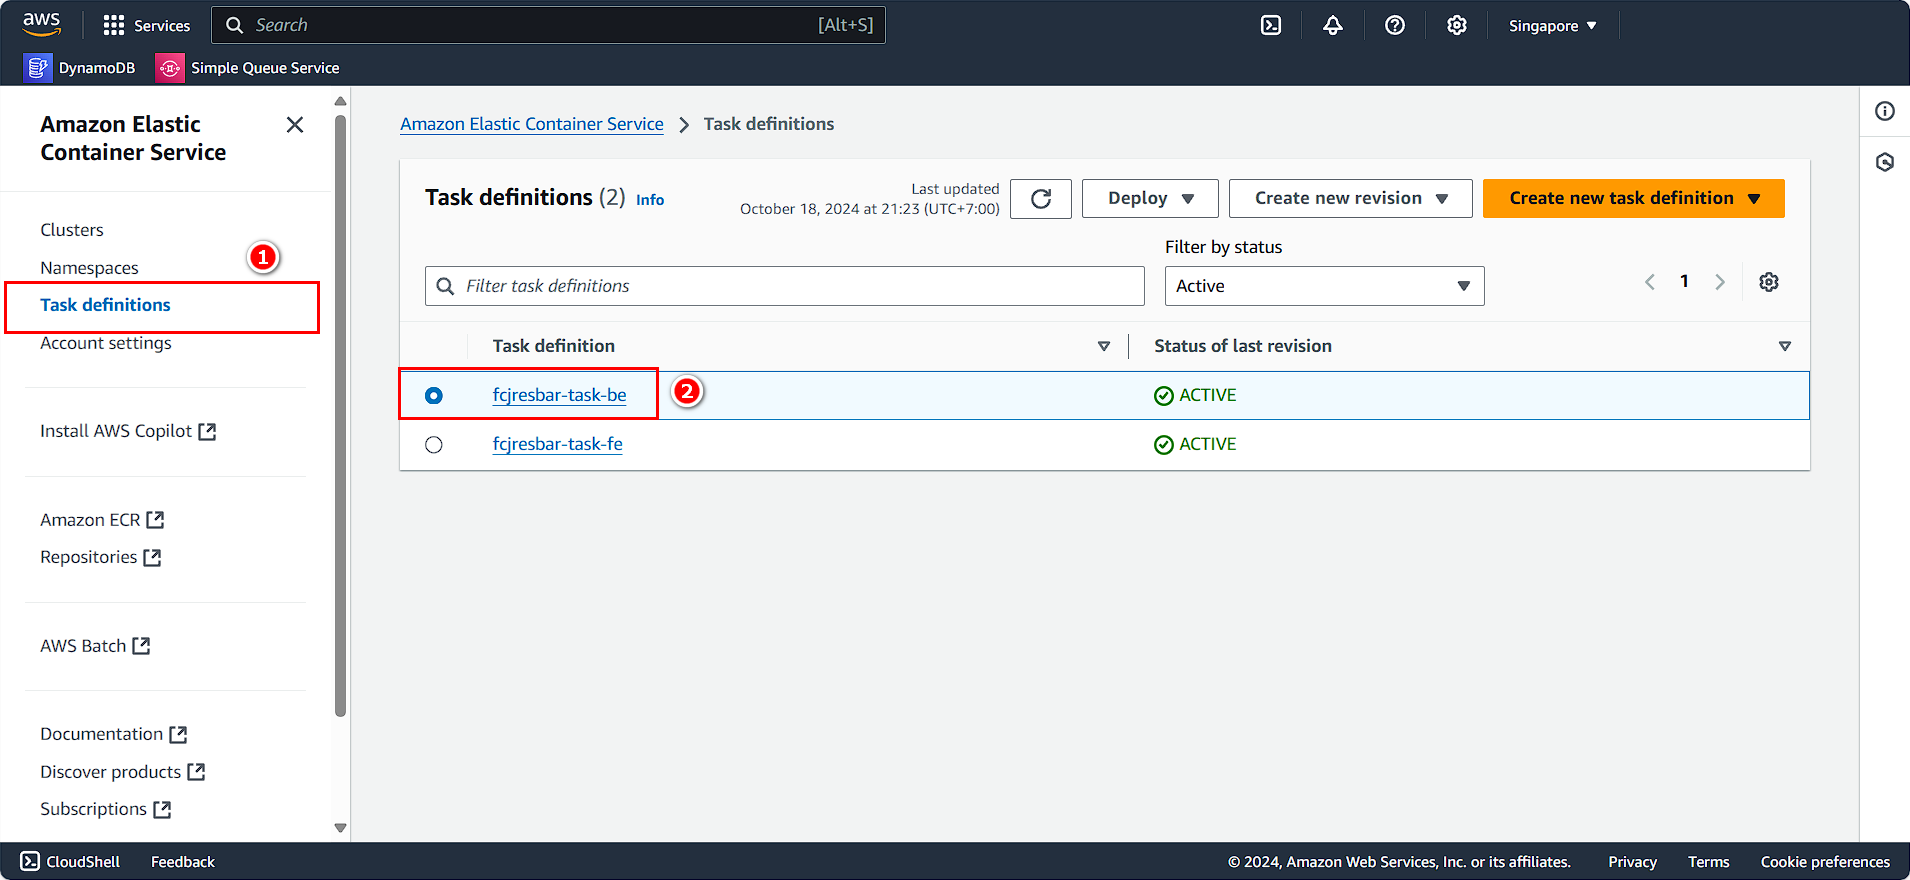
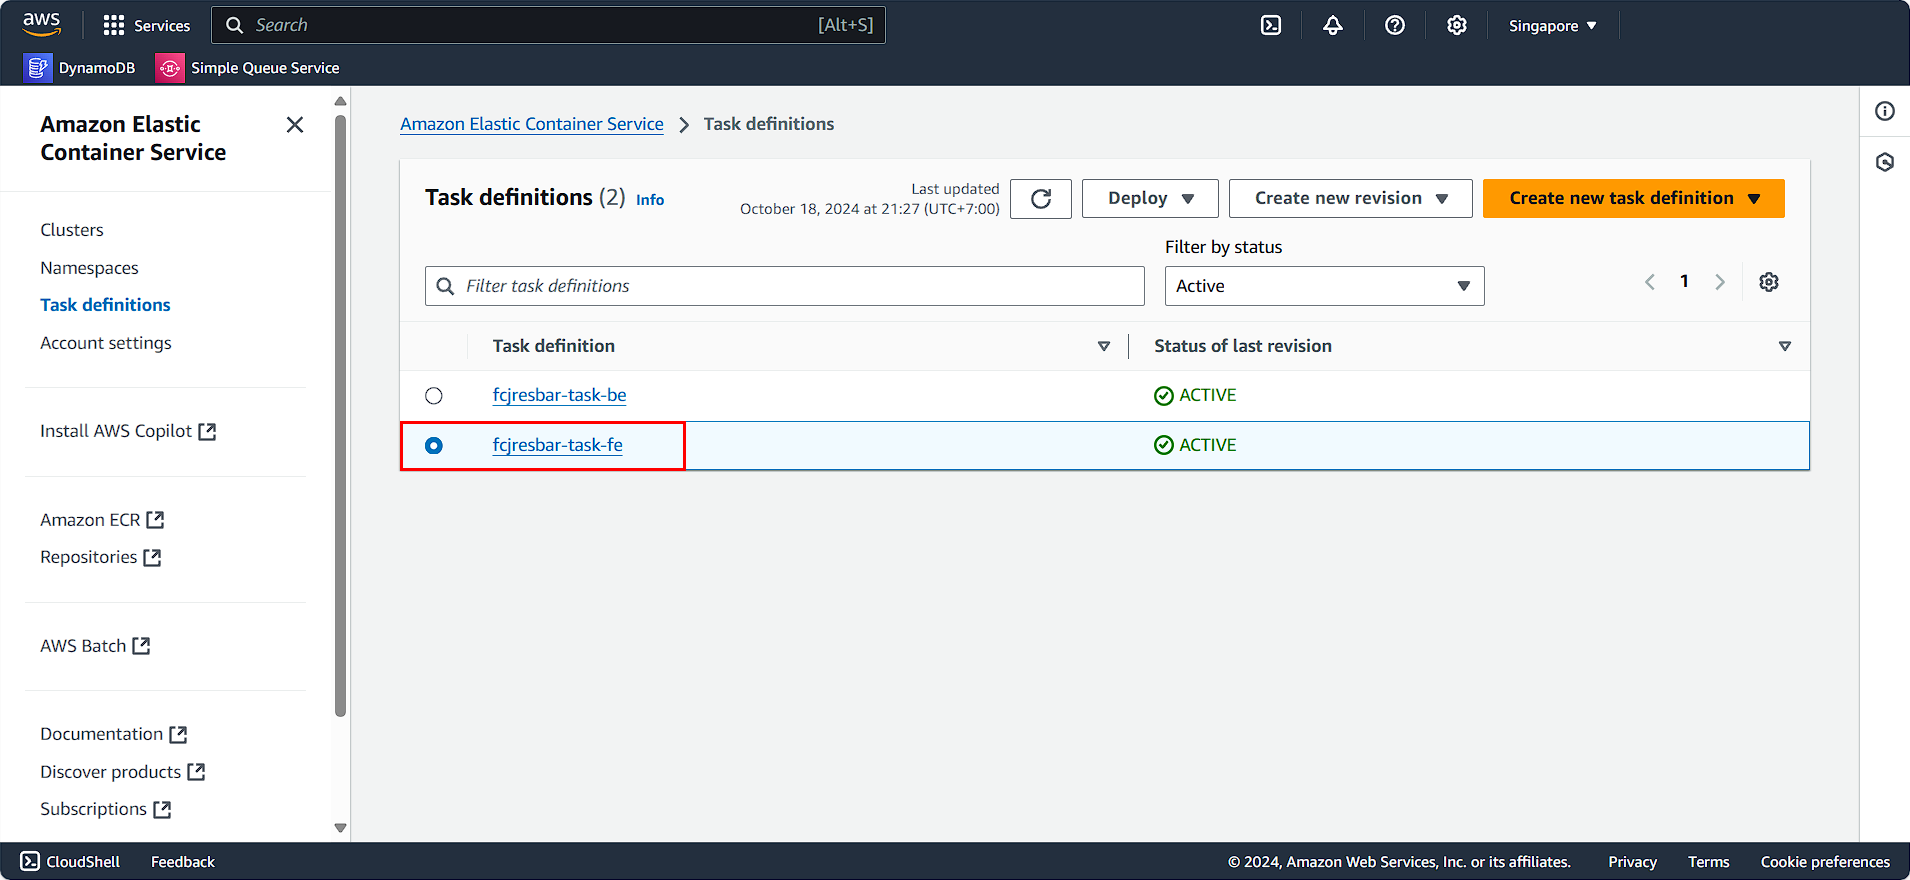
Next, we will clean up the task definitions:
- Select Task definitions.
- Choose the task you want to delete.
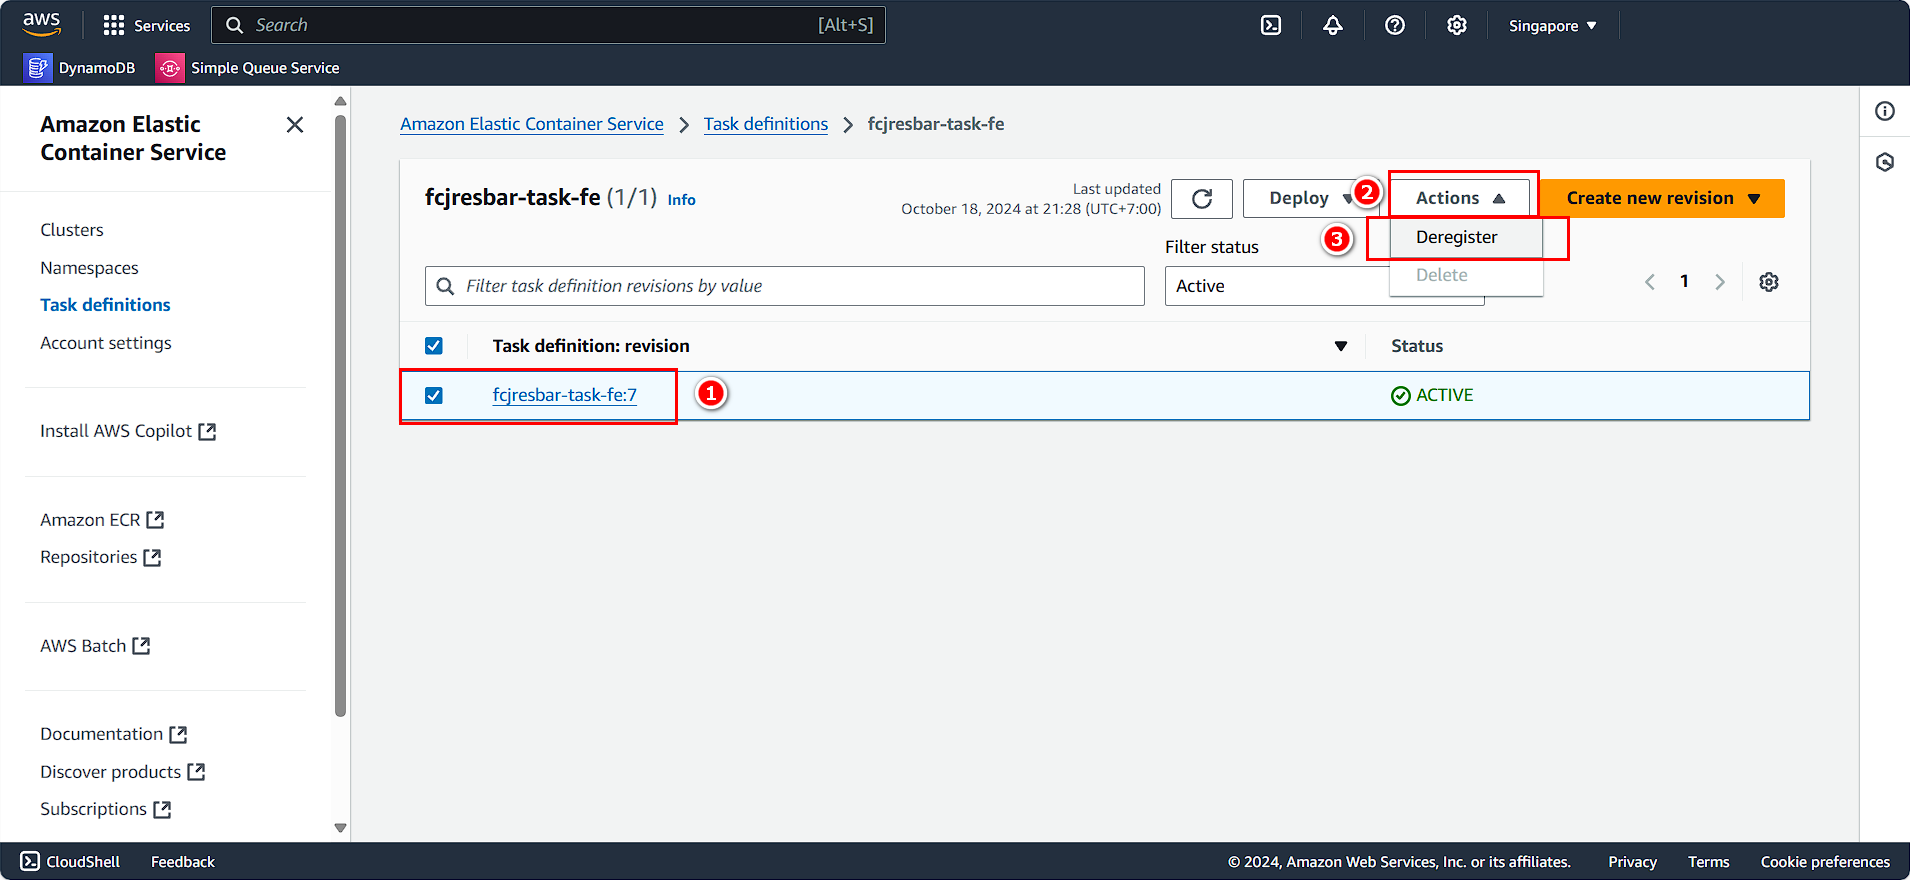
- Continue following the instructions:
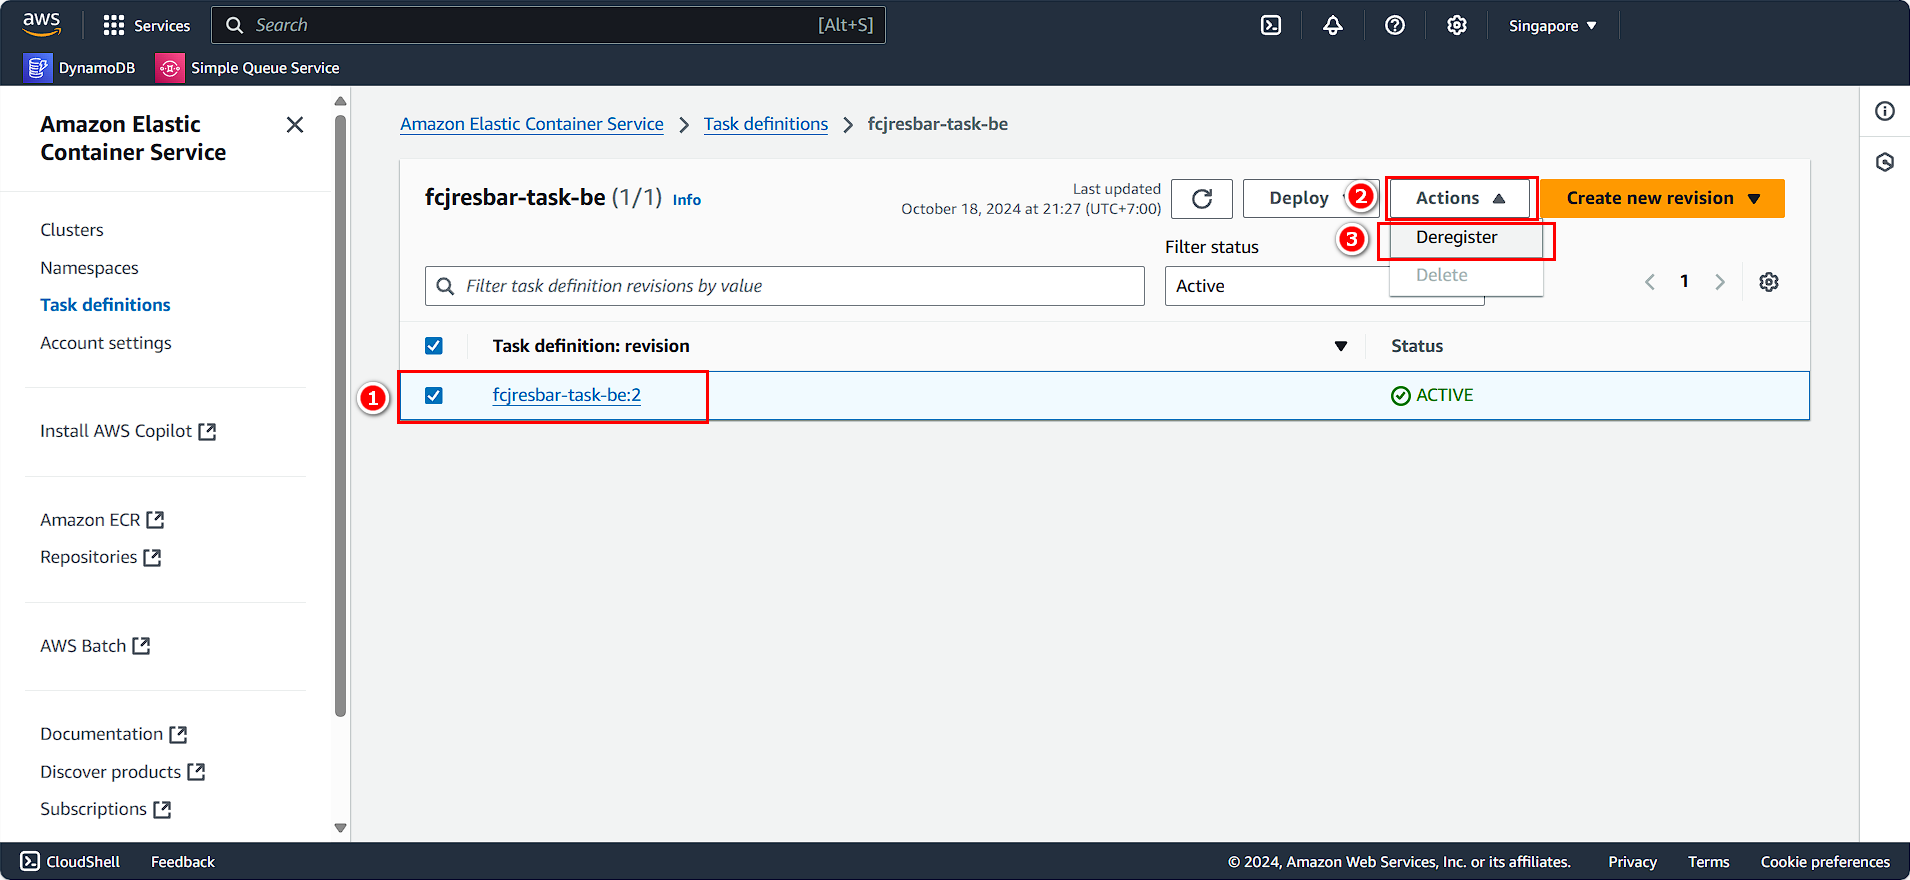
- Select the task definition.
- Click Action.
- Choose Deregister.
Repeat the process to delete the remaining task.
- Follow the instructions.
You have successfully deleted the ECS and its services.
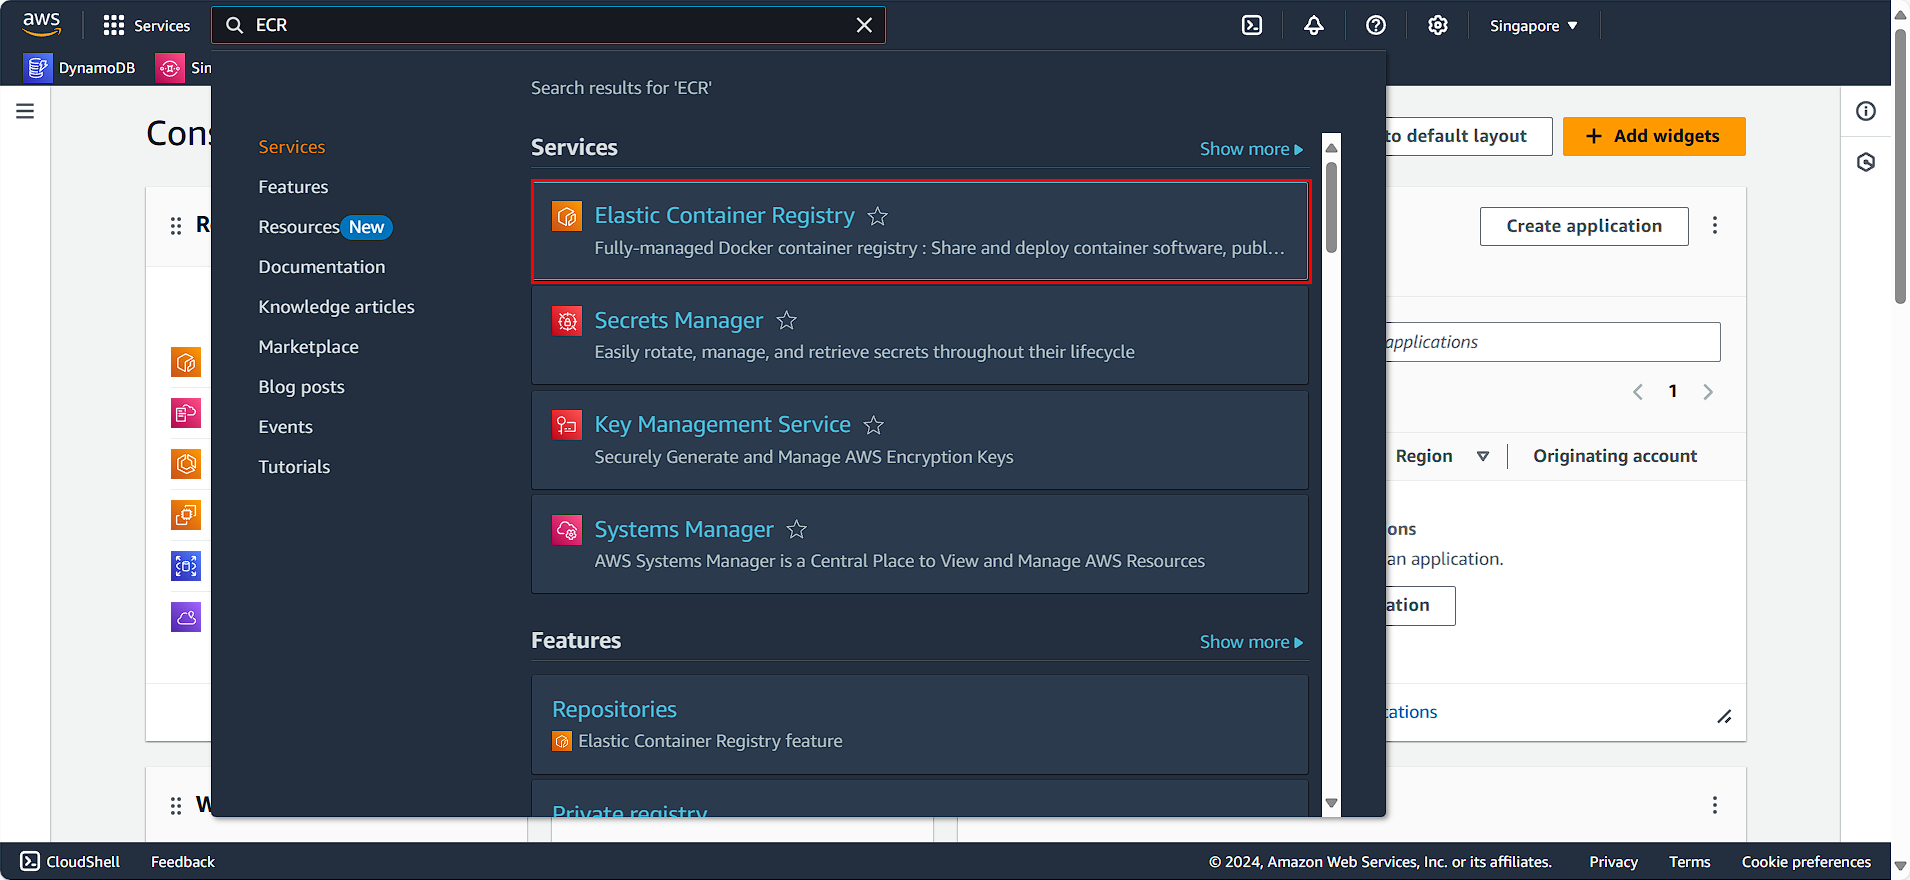
Clean Up Elastic Container Registry
On the AWS Console interface:
- Search for and select Elastic Container Registry.
You will see the two repositories we created earlier:
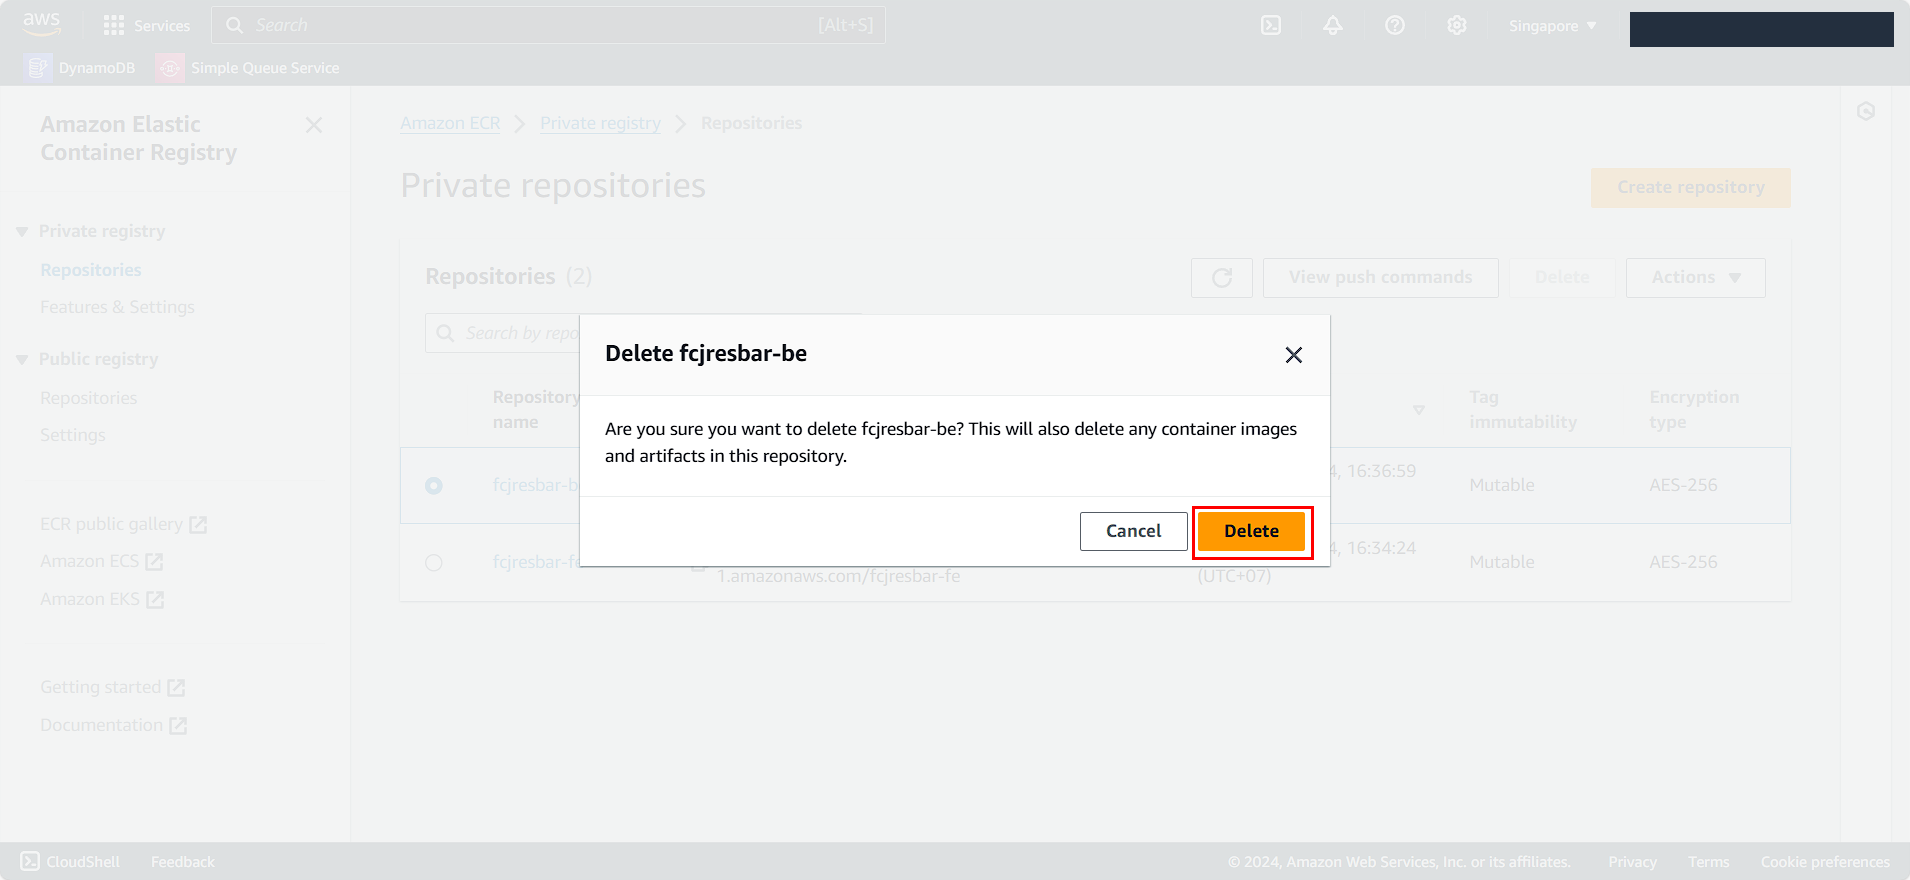
- Select fcjresbar-be.
- Click Delete.
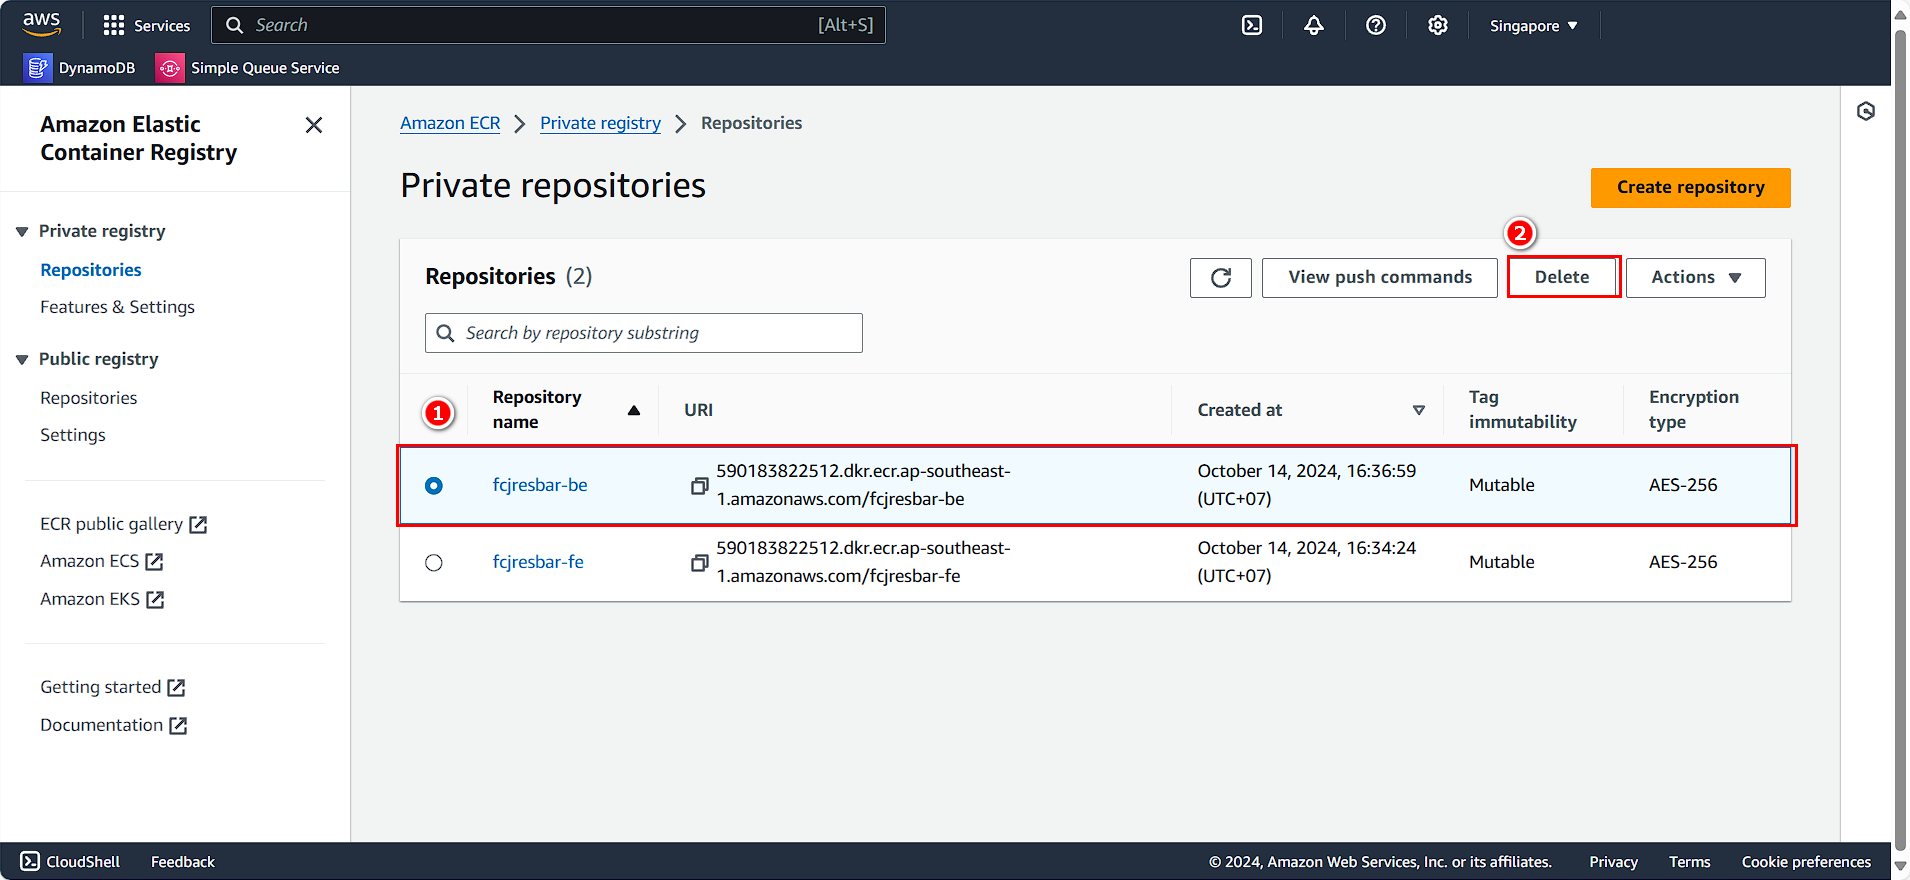
- Confirm the Delete action.
Similarly, perform the same for the other repository:
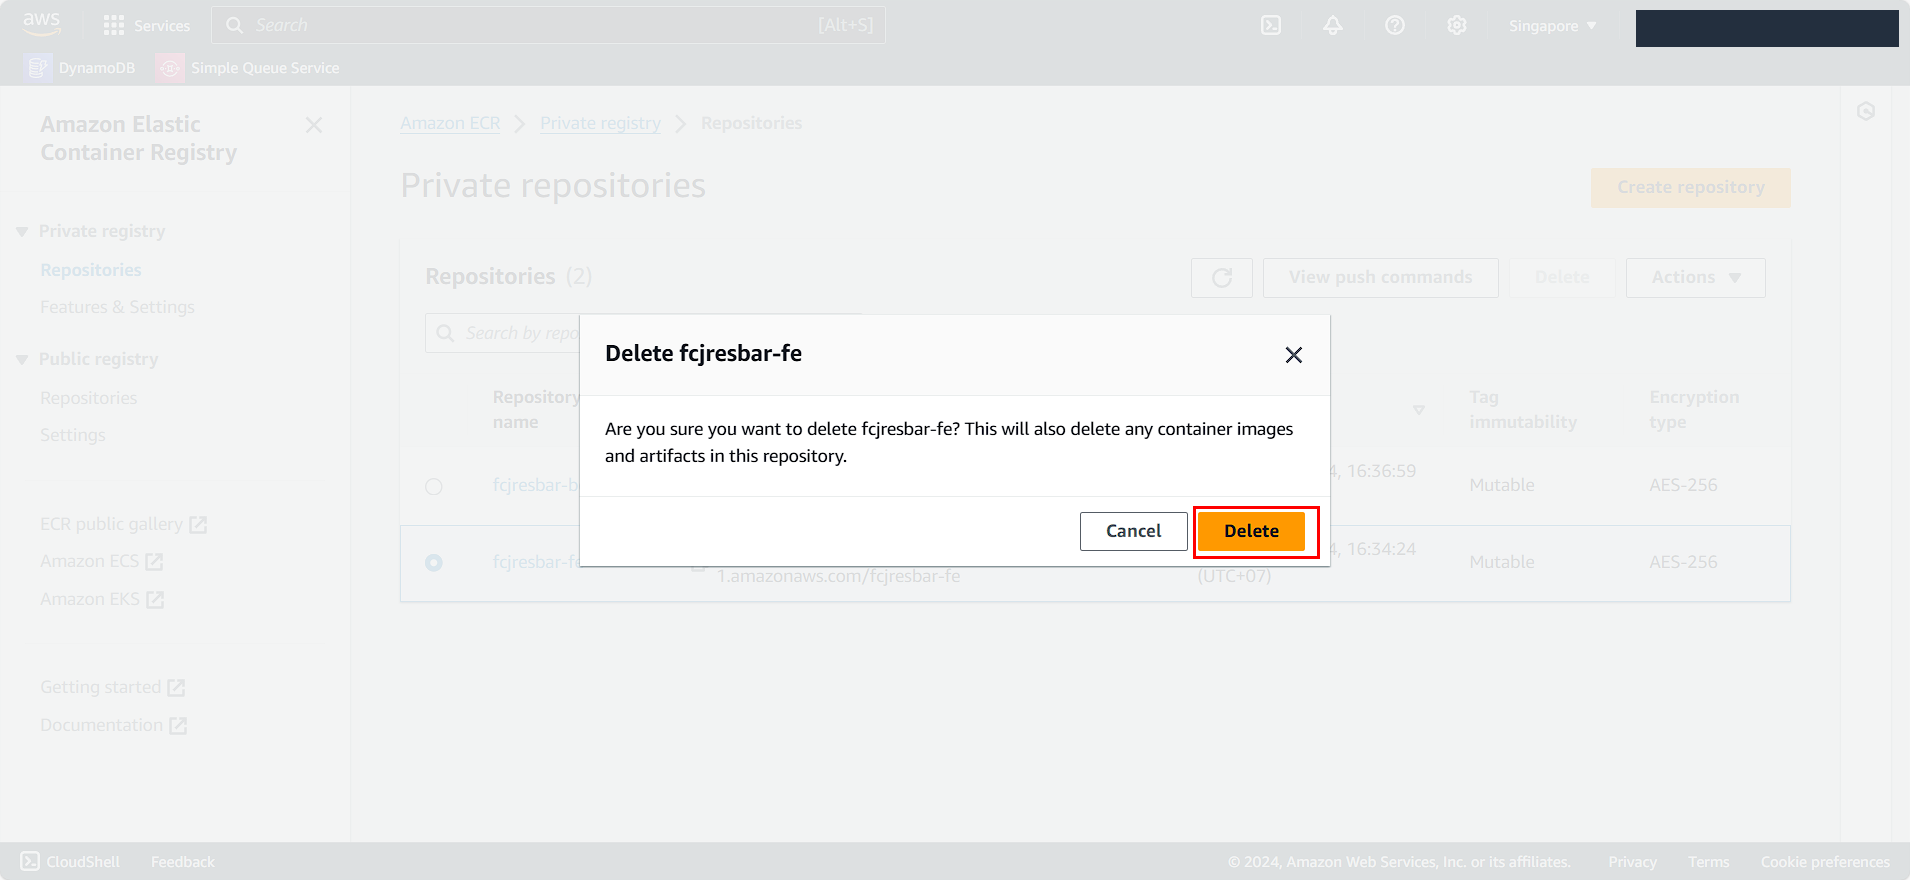
- Select fcjresbar-fe.
- Click Delete.
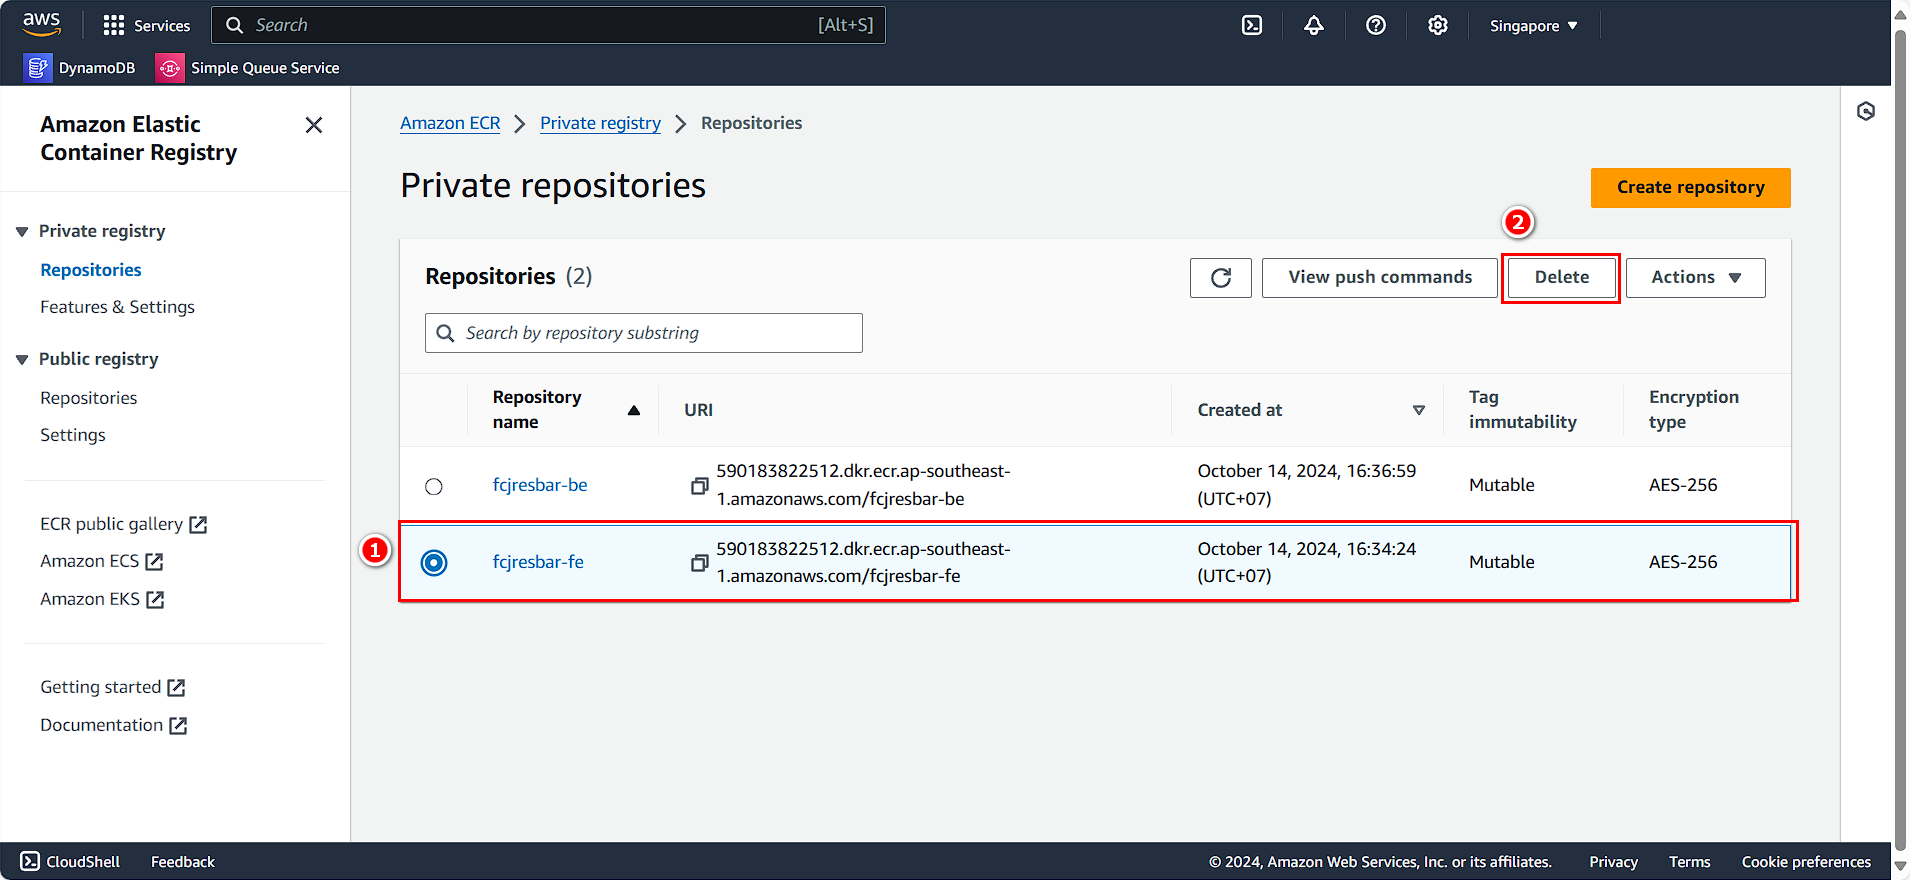
- Confirm the Delete action.
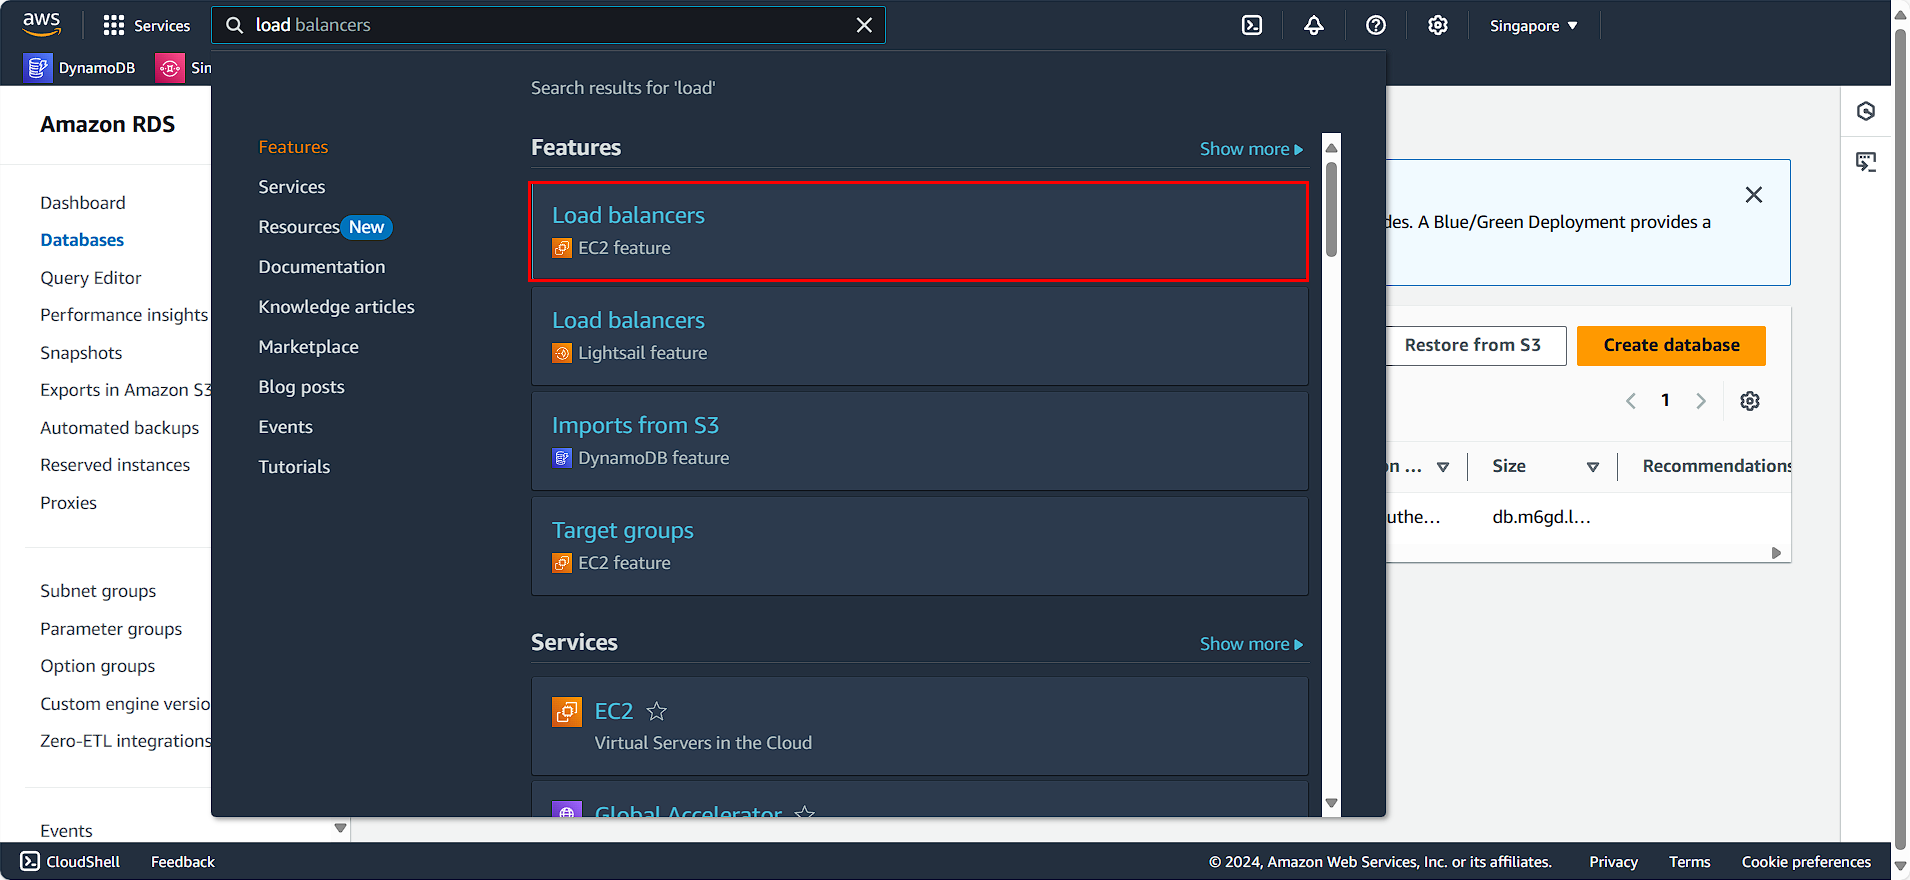
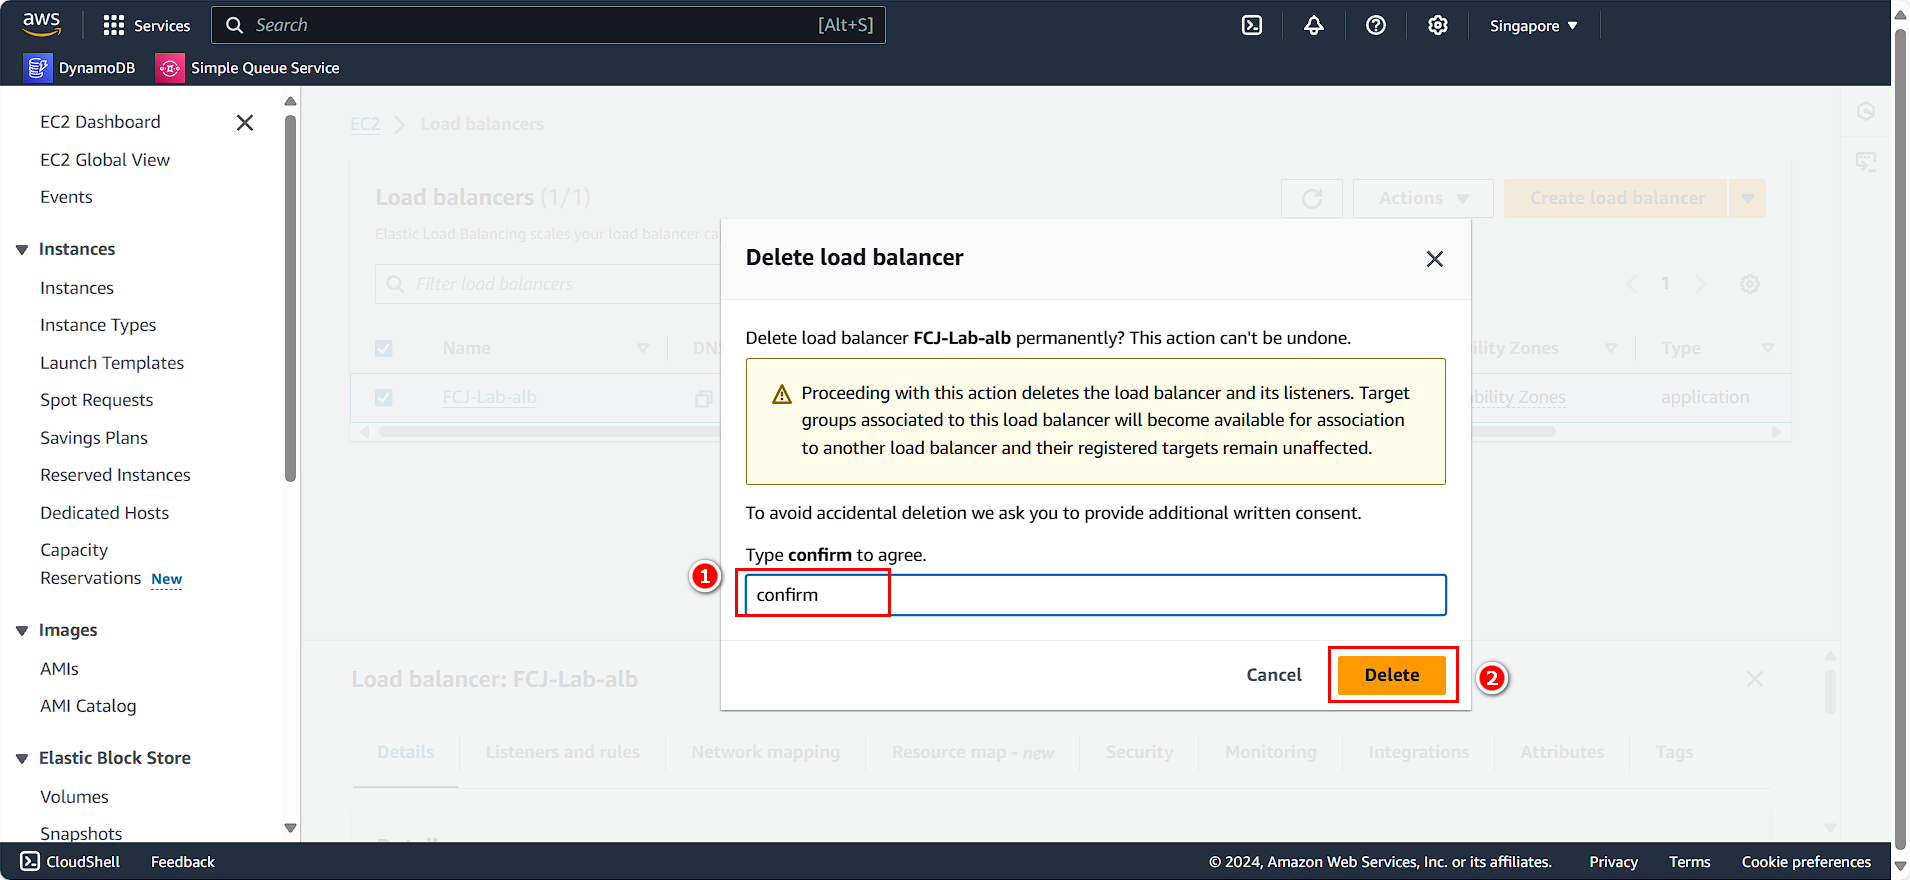
Delete Load Balancer
- Search for and select Load Balancer.
- Choose the Load Balancer you created.
- Click Action.
- Select Delete load balancer.
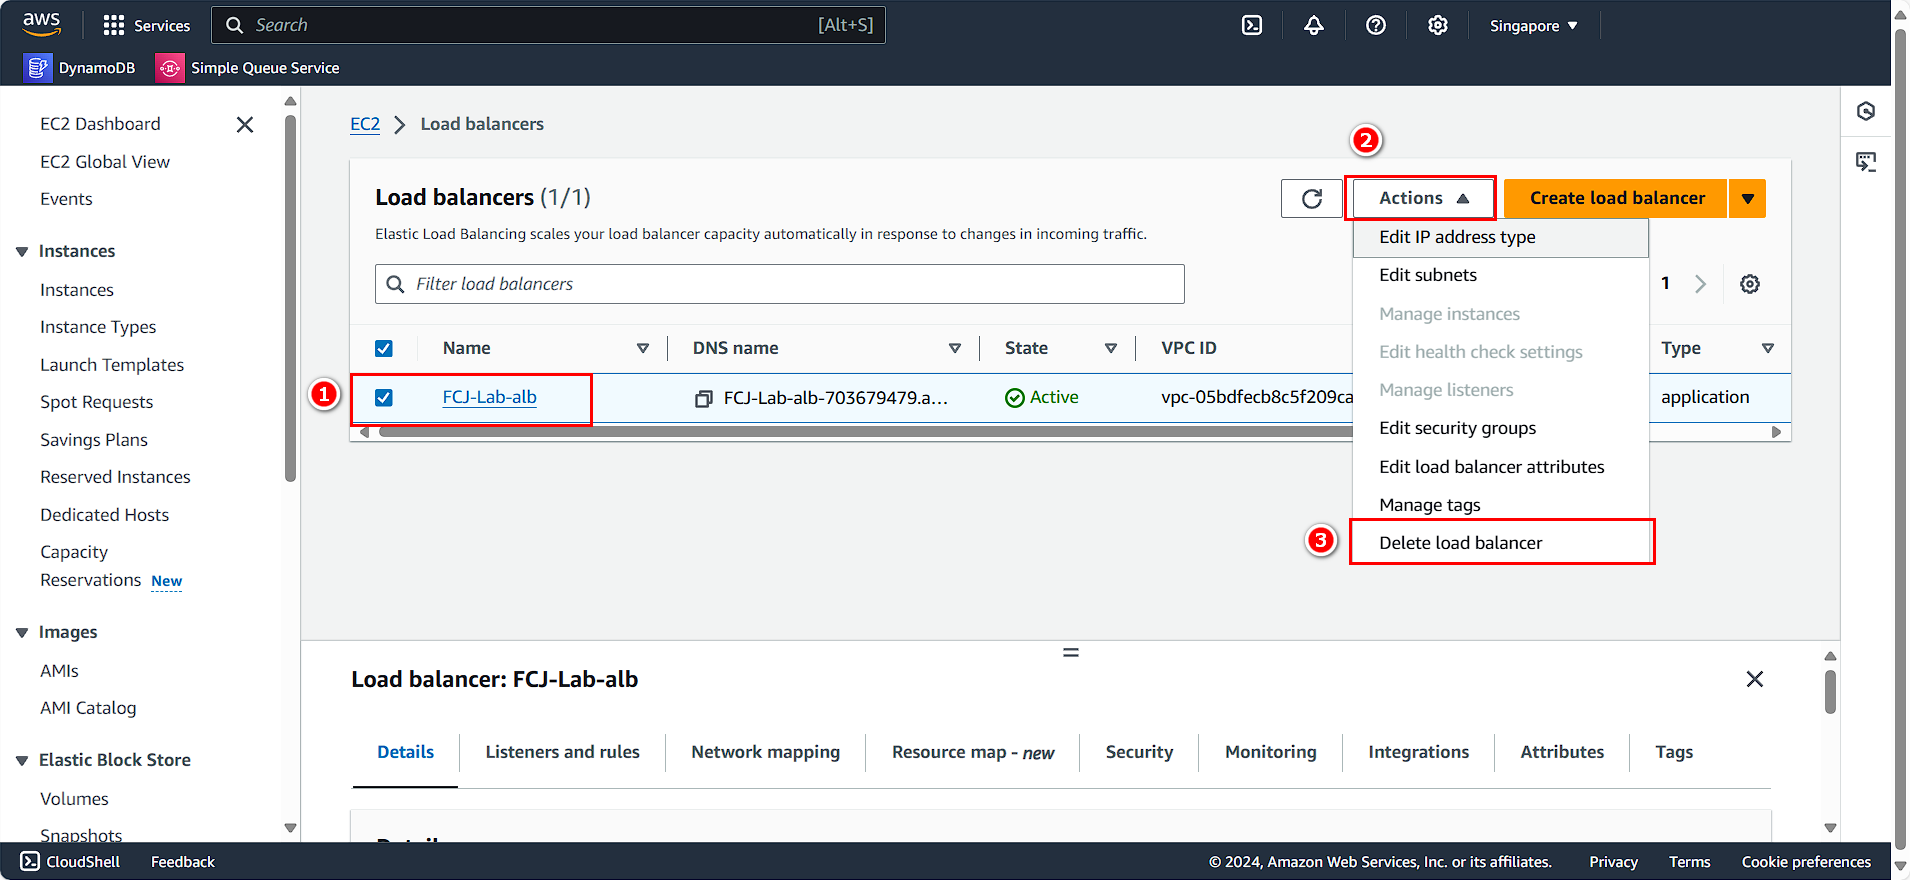
- Enter confirm.
- Click Delete.
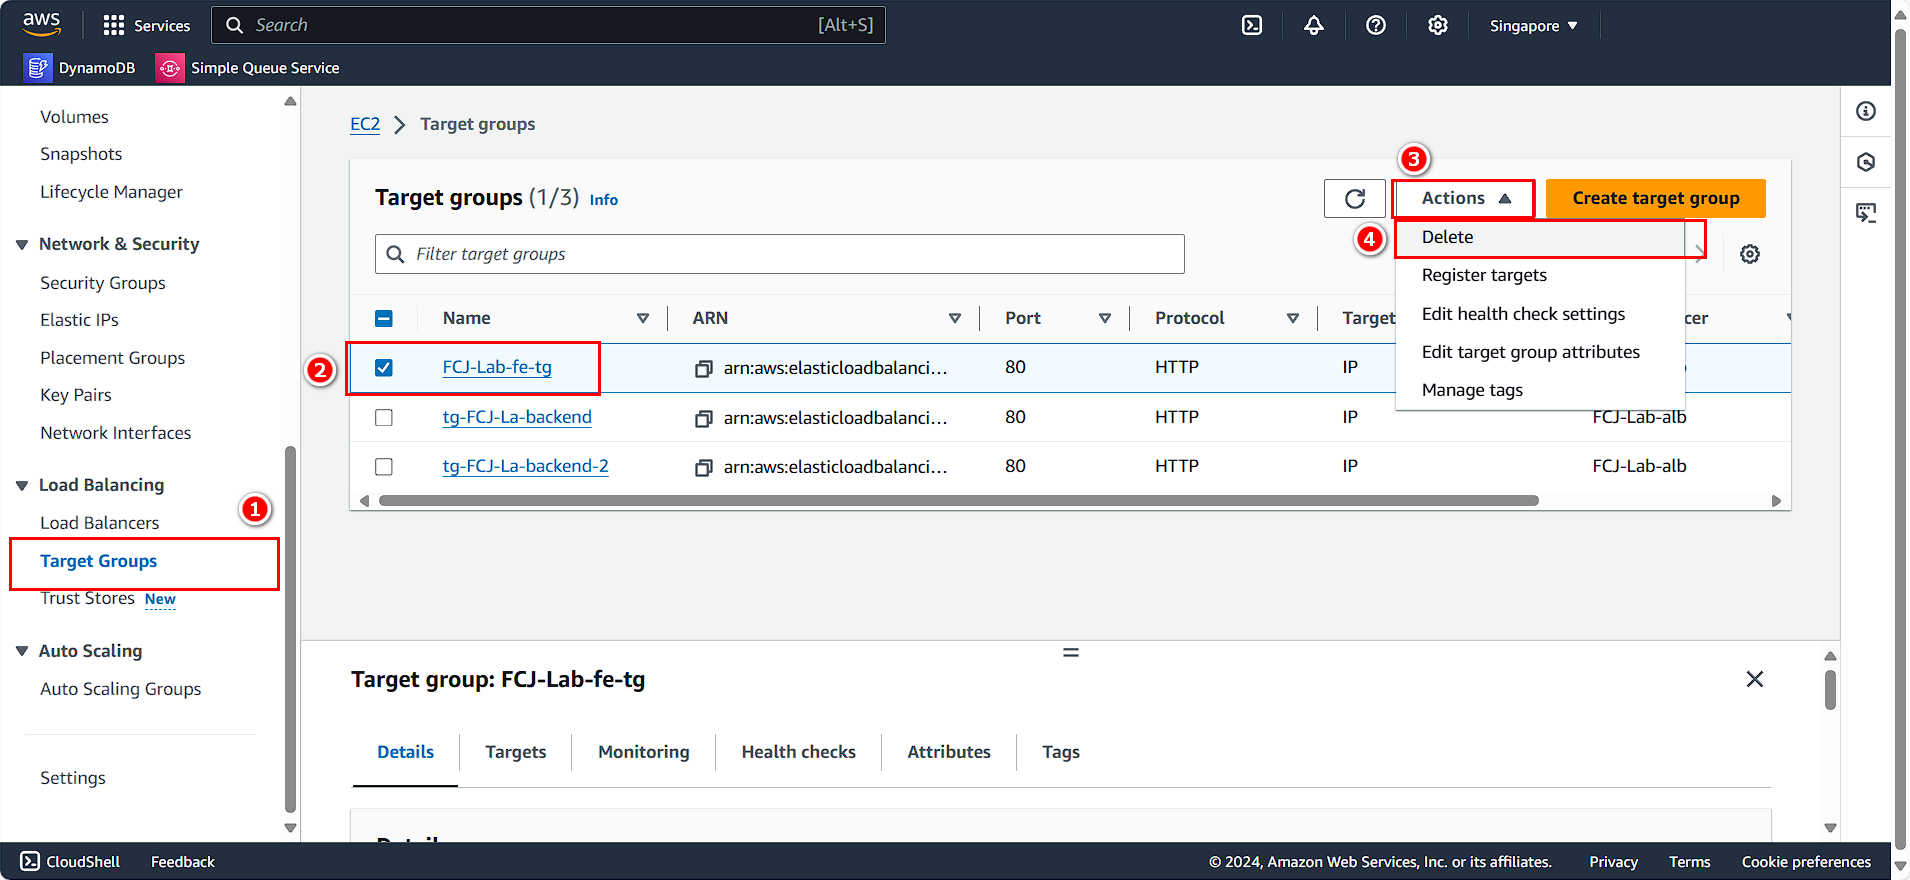
Clean Up Target Groups
In the left panel:
- Select Target Groups.
- Choose the target group you created.
- Click Action.
- Select Delete.
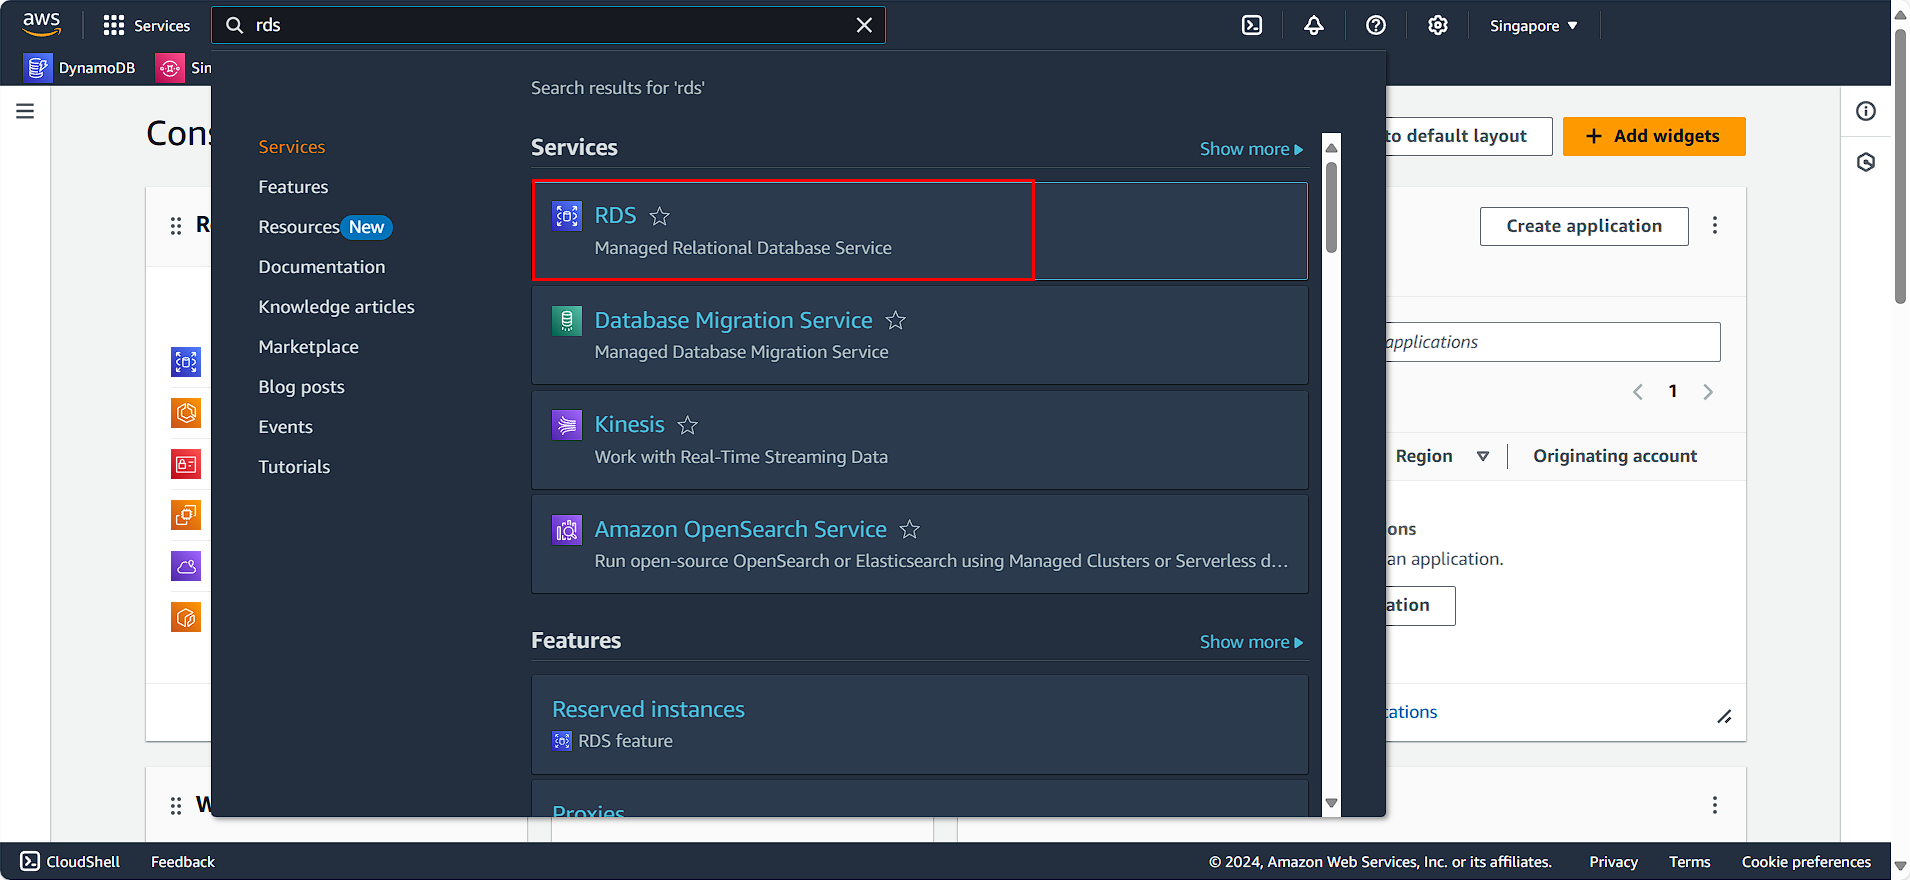
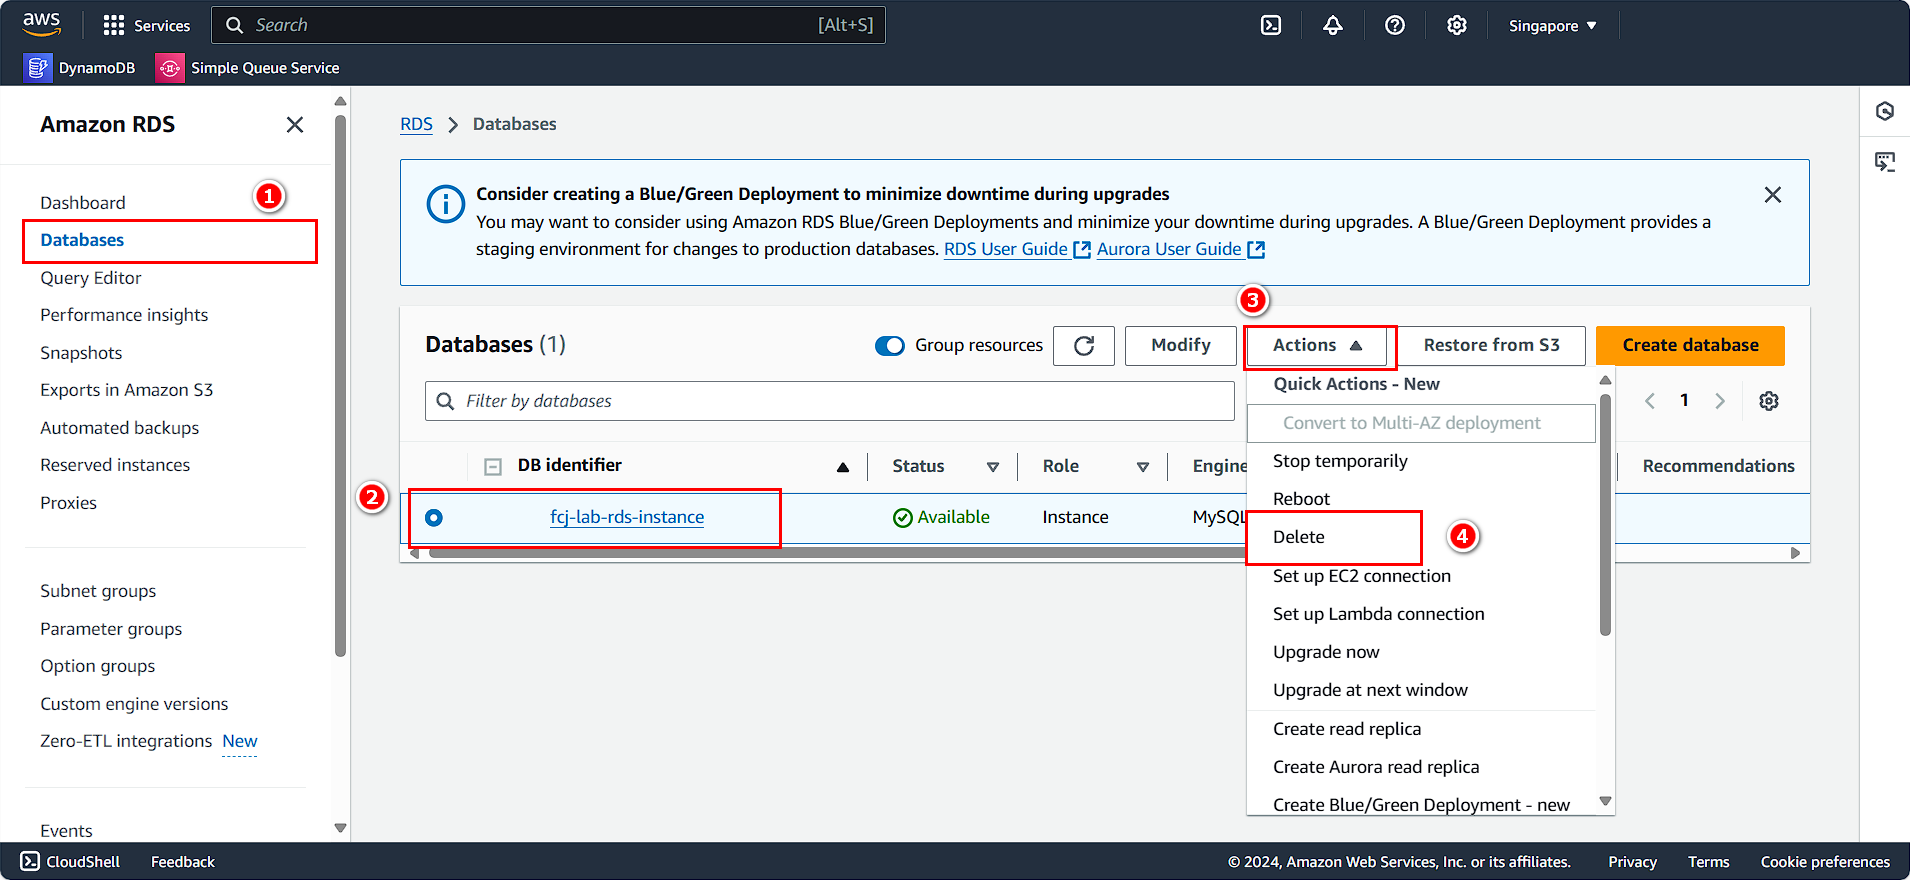
Clean Up RDS
On the AWS Console interface:
- Search for and select RDS.
- Select Databases.
- Choose the RDS instance you created.
- Click Action.
- Select Delete.
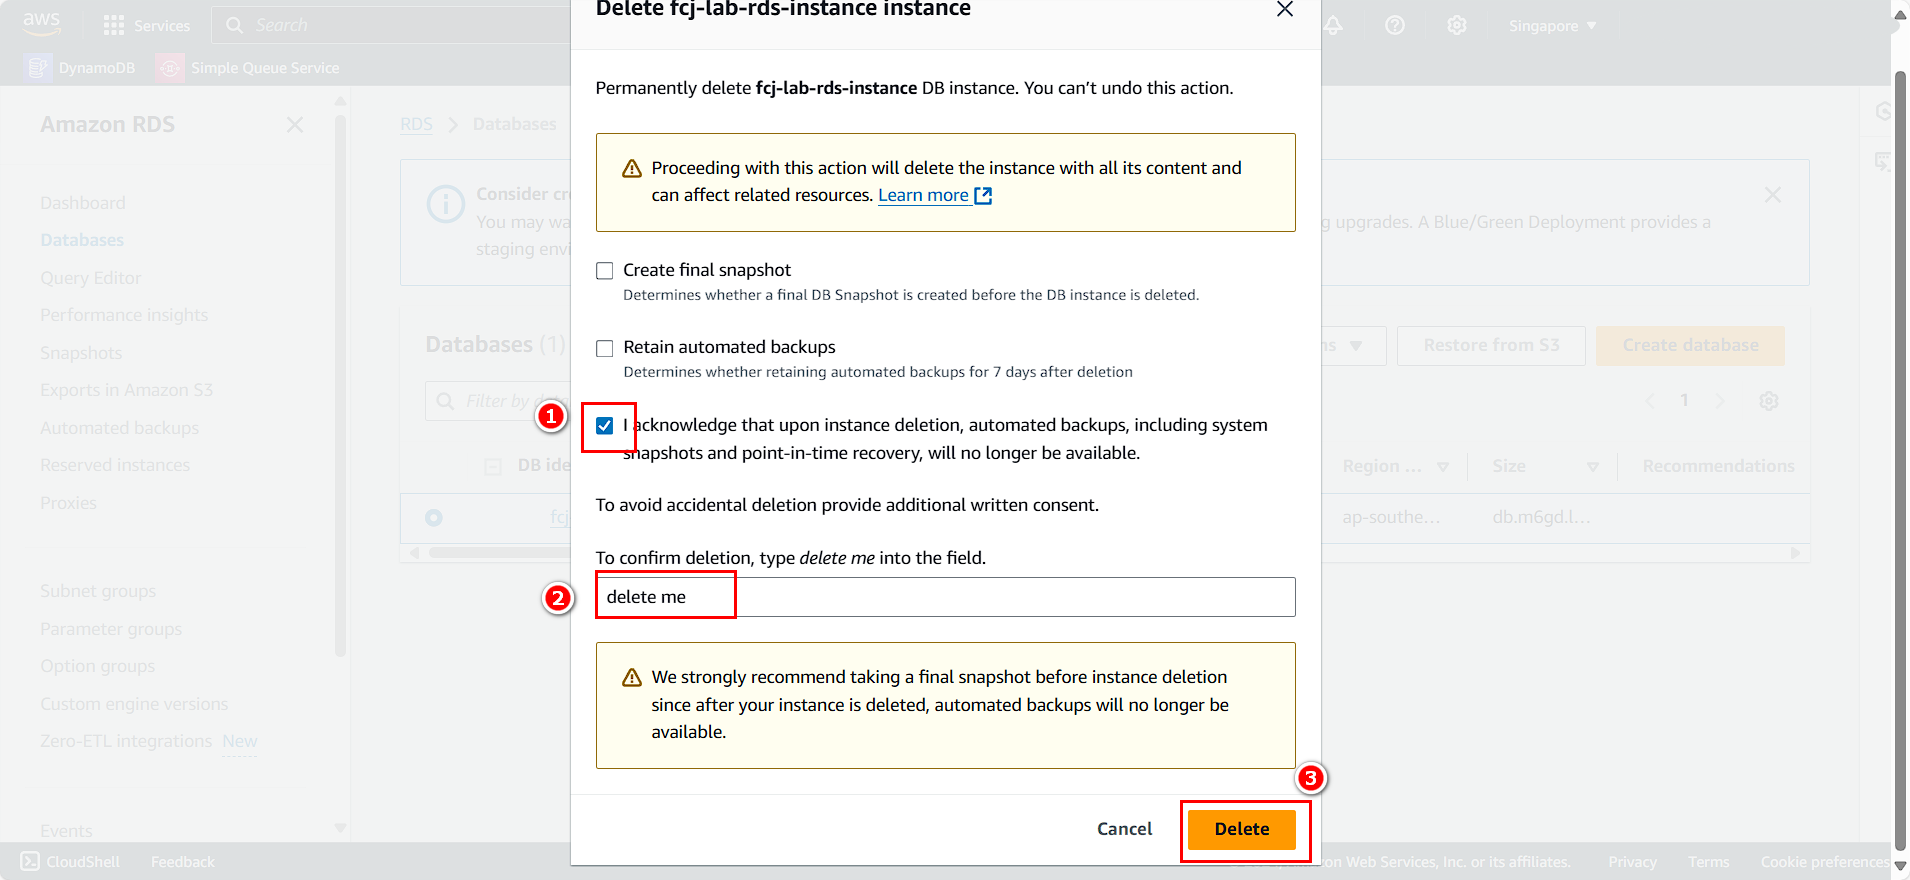
- Check I acknowledge that upon instance deletion, automated backups, including system snapshots and point-in-time recovery, will no longer be available.
- Enter
delete me. - Click Delete.
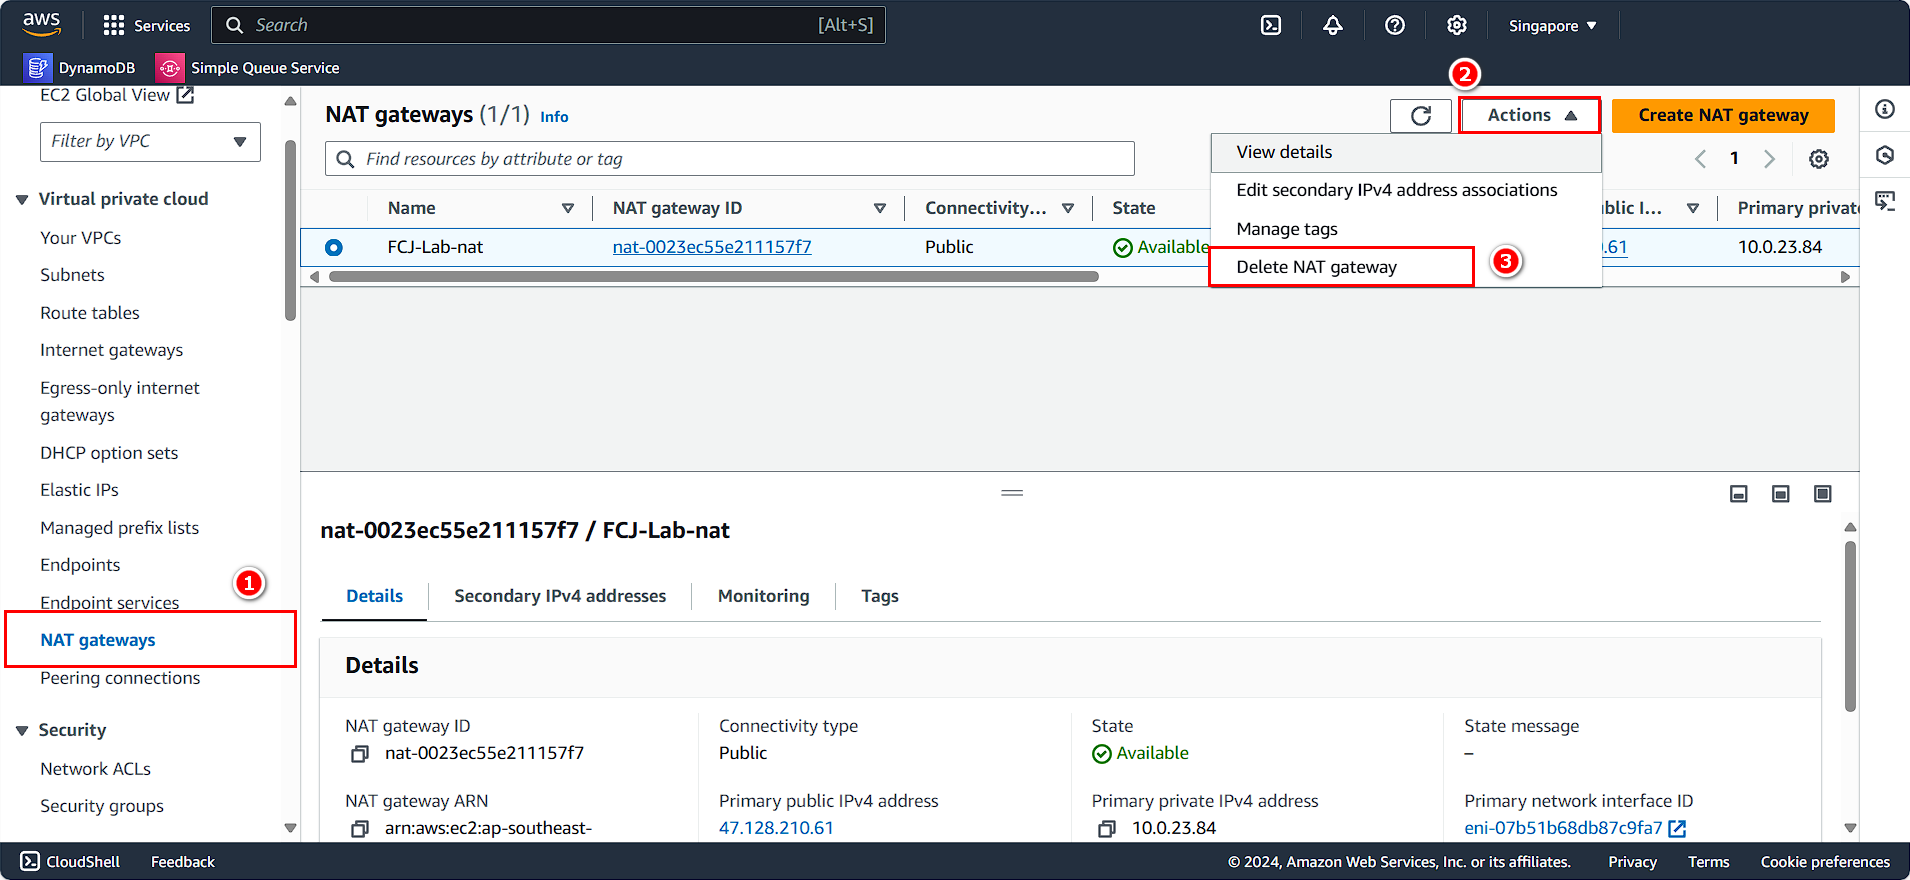
NAT Gateway
- Search for and select
NAT gateway
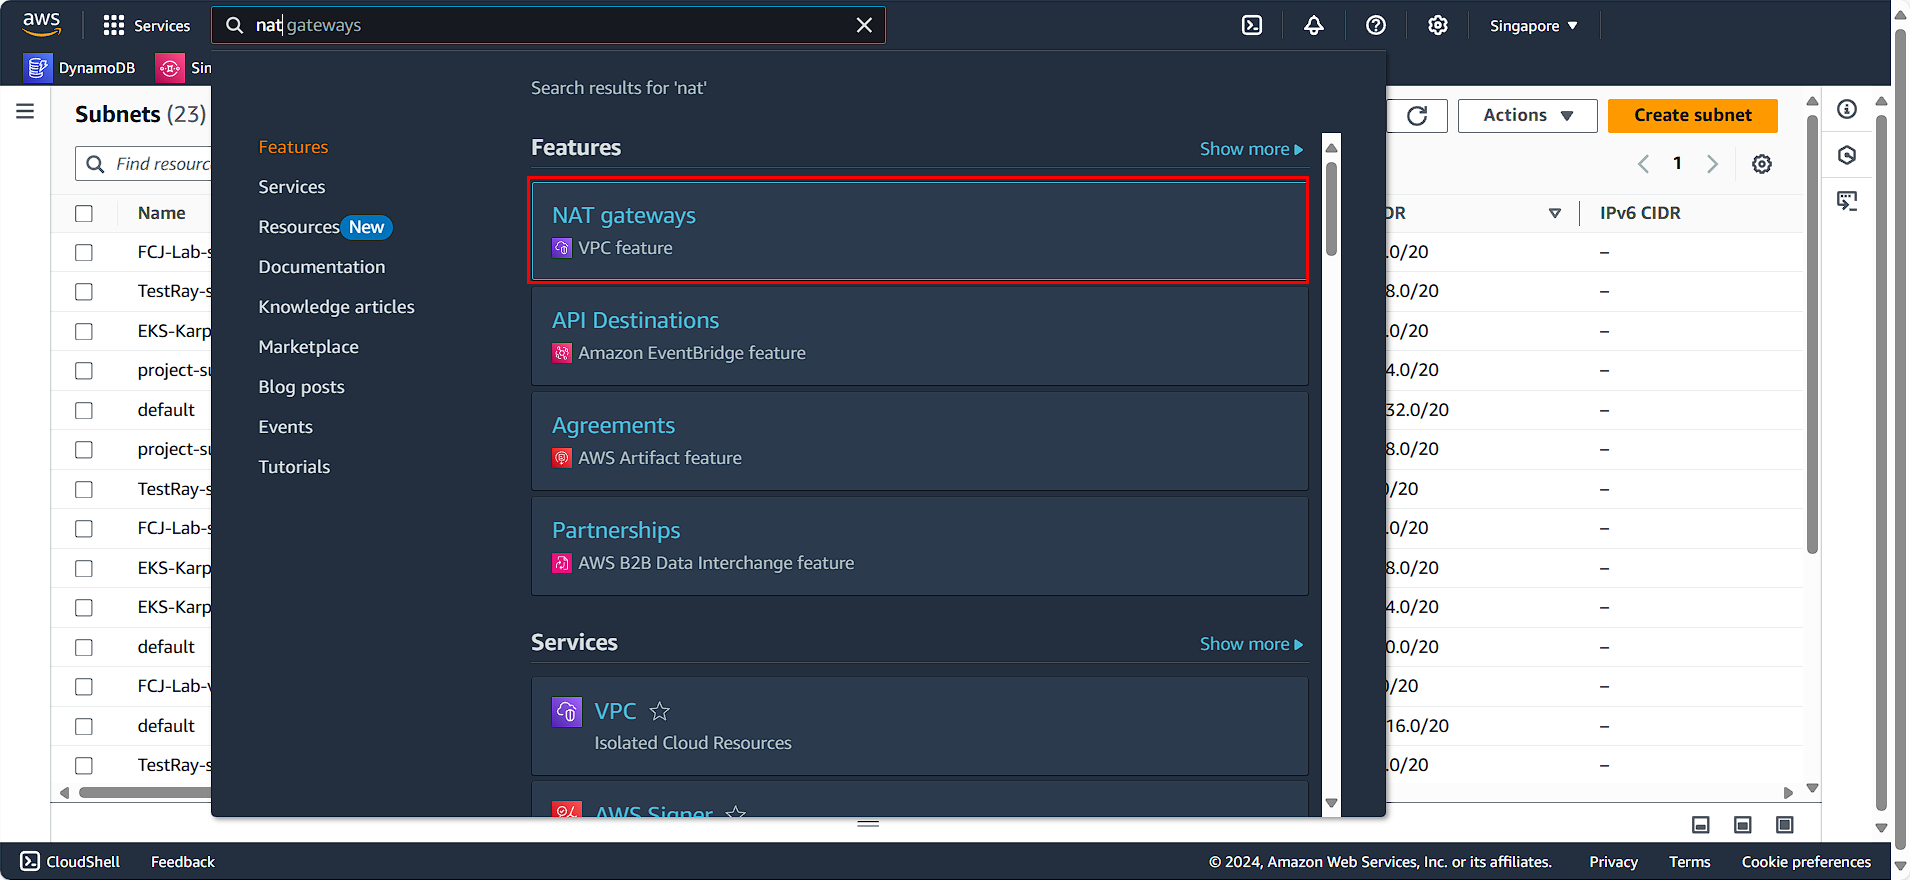
- Select the NAT Gateway you created
- Click on Action
- Choose Delete NAT gateway